Greetings friends and fellow crafters. Lee Ann here with another project for the Coffee Lovers Blog Hop. I just love making cards for this event every year.
For today's card I used all new to me products. first thing I did was take a panel of white Recollections cardstock and added a 1" strip of double side tape down the side. I took a strip of Rainbow Foil from Bluebonnet and burnished it on. I peeled back the liner and had a beautiful foil rainbow on my panel.
I then layered up black and white cardstock to create a sentiment and focal panel.
The stamp I used is from Crackerbox-So Suzy stamps ordered specifically for this hop event, this was stamped using Versafine Clair ink in Nocturne.
The next thing I did was used the Layered Coffee Cup die by KatScrappiness and cut it out of Kraft, White and Lime Green cardstock. Following the layering directions on Kat's website I put the cup together using double stick tape for the bigger pieces and On Point Glue for the smaller pieces like the lid.
On Point Glue was also used to add the Jewels to the panel and cup grip.
Double stick tape was used to adhere all panels to the front of an A2 card base and my project was complete.
Wednesday, May 27, 2020
Tuesday, May 26, 2020
Enjoy Your Day with The Maker's Movement
Greetings friends and fellow crafters. LeeAnn here with a post using the Maker's Movement stamp and die set "Hanging Around".
To make this card, first I cut a white panel 3.75" x 5". I used the leaf outline stamp and stamped it all over using Memento Tuxedo Black ink.
I then used the second layer of the leaf and stamped using Memento Bamboo Leaves.
The same Memento Tuxedo Black was used to stamp the flowers and sloth. The flowers were then stamped with the second stamp using Memento Tangelo, and colored over with and Ohuhu R2 Alcohol Marker.
After stamping the sentiment using VersaMark it was heat embossed using Recollections "Snow" Detail Embossing Powder.
The dies that came with the set were used to cut the flowers, one leaf, sloth and branch.
I used a 3" circle die to cut a circle from the center of the panel, a 3.5" square of acetate was attached to the back of that panel with the missing circle using double side tape, a layer of foam tape was used next to add a bit of dimension, I added some confetti sprinkles to the inside of this and another 3.5" square of acetate to the back to hold the confetti in.
After lining the cut away circle to the back of the acetate so that it would show through, I taped it down. I then used double side tape to add the shaker element to the green layer of cardstock cut 4"x5.25". This was also attached to a layer of black cardstock leaving a small border around. This was then adhered to a 4.25" x 5.5" top folding card base.
I attached all the elements (branch, sloth, leaf, flowers and sentiment panel) to the card using glue dots and with that my project was complete.
Thank you for viewing my project today. I had so much fun with this set, and this as well as many other fun sets can be found at The Maker's Movement.
Monday, May 25, 2020
Joy Clair Cup Runs Over
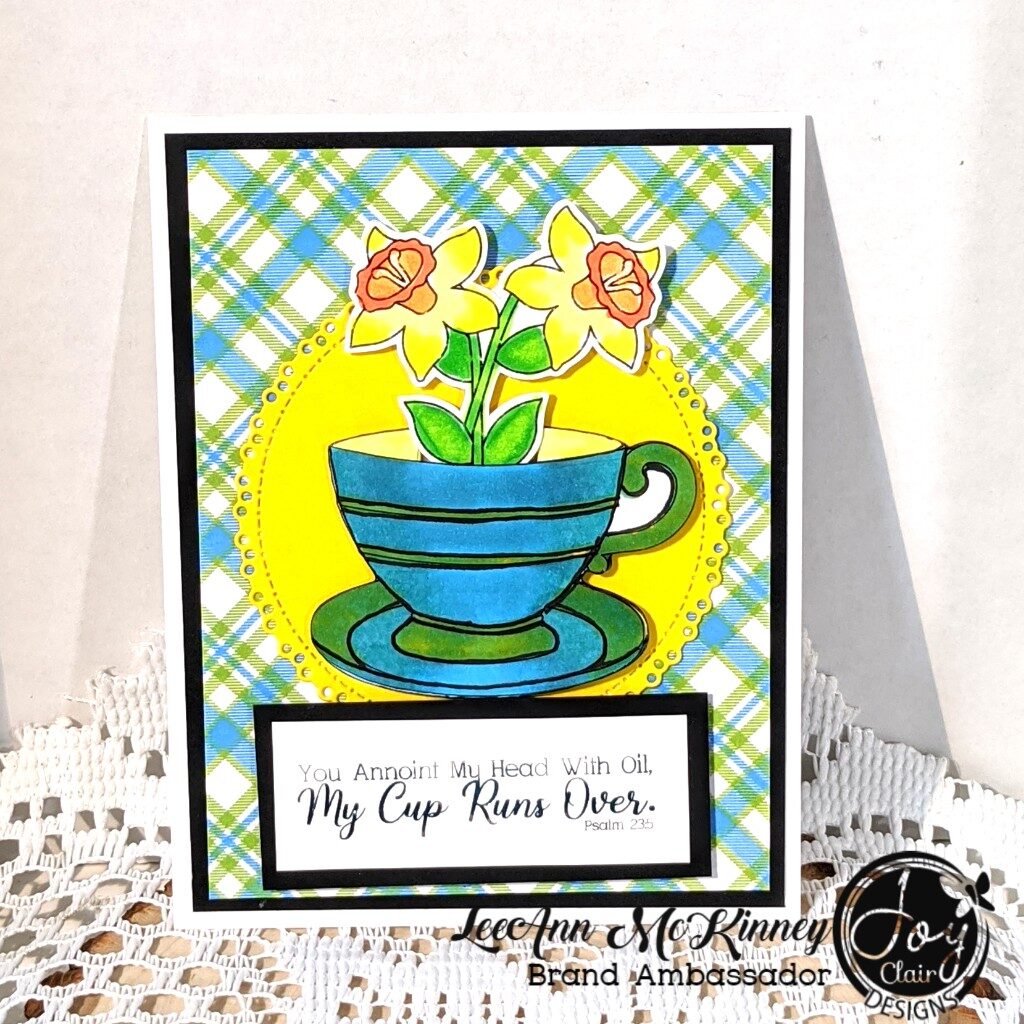
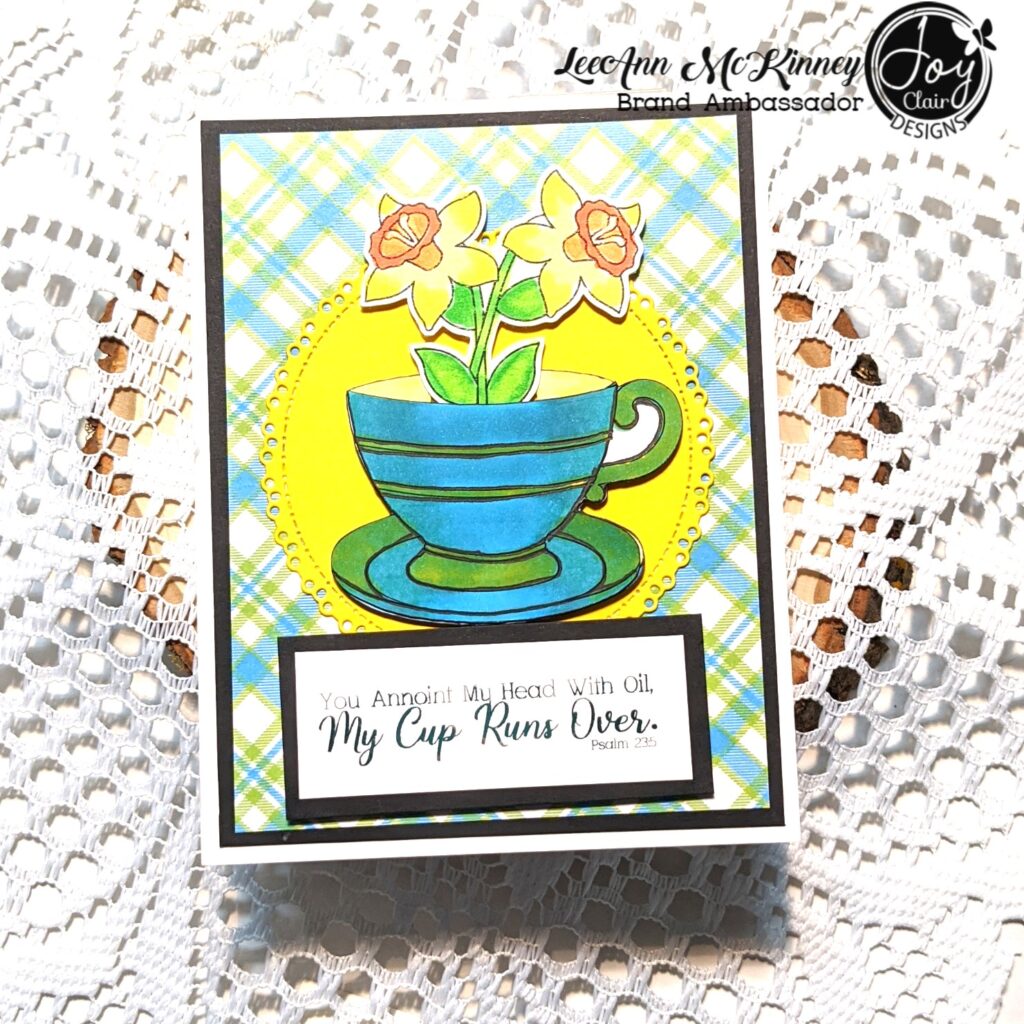
Thank you for stopping by the see my post today.
The stamp set I used and many more can be found at The Joy Clair Store
See the rest of the teams posts on our blog
Follow us on Pinterest and Instagram
Affiliate links are used at no extra cost to you. This helps me support my crafty life!!!
 VersaFine Clair Nocturne Shop at: KS | SBC |
 Nuvo Deluxe Adhesive Shop at: KS |
 Scrapbook Adhesives Foam Squares Shop at: KS |
 Recollections 110 lb Cardstock Shop at: MISC |
 Recollections 65 lb Cardstock Shop at: MISC |
 On Point Glue Shop at: IC |
 Crafty Foam Tape Shop at: JCD |
 Spring Floral Basket Digital Stamp Set Shop at: JCD |
 Joy Clair "Cup of Joy" Digital Stamp Shop at: JCD | |
Sunday, May 24, 2020
Happiness Is...
Greetings friends and fellow crafters. Having fun with some stamps from CrackerBox/So Suzy for the Spring/Summer Coffee Lovers Blog Hop.
To make this card I started with a panel of 110 lb white cardstock. After masking out the center of my panel, I used Gathered Twigs Distress Oxide and the Tim Holtz Coffee Rings stencil to put rings on the panel. I removed the mask and stamped the coffee lady using Memento Tuxedo Black Ink. I stamped the sentiment using VersaFine Clair in Nocturne. This panel was added to a brown cardstock layer and then attached to my card base. My image was colored using Ohuhu Alcohol Markers.
I hope you enjoyed this fun project.
Friday, May 22, 2020
Thinking Of You with Joy Clair Designs

Greetings friends and fellow crafters... It is my favorite time of the Spring/Summer season!!! The Coffee Lovers Hop is here!!!
Today I have this "Thinking of You" card using the digital "Cup of Joy" stamp set from Joy Clair Designs. To make this card I printed this image using my Brother Laser printer, and cut it out using my Brother Scan N Cut. I then used my Ohuhu Alcohol markers to color the images in bright Springy colors.
For the background layer which is Watercolor paper, I spritzed water on my layer and added some Chartreuse Color Burst powders.
Once that panel was dry, I adhered it to a layer of black cardstock and then to my cardbase using liquid glue. The Cup of Flowers is adhered using Foam adhesives and the sentiment panel was attached using liquid glue. I added a couple strips of Love From Lizi Glitter peel off's to the sentiment panel to complete my project.
All products used can be found at the links below:
 Nuvo Deluxe Adhesive Shop at: KS |
 Scrapbook Adhesives Foam Squares Shop at: KS |
 Recollections 110 lb Cardstock Shop at: MISC |
 Recollections 65 lb Cardstock Shop at: MISC |
 On Point Glue Shop at: IC |
 Joy Clair "Cup of Joy" Digital Stamp Shop at: JCD |
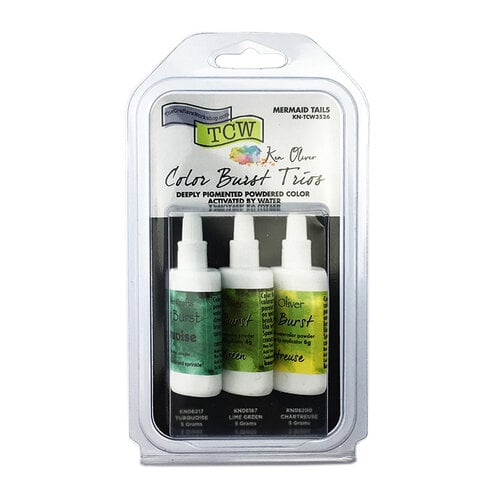 Ken Oliver "Color Bursts" Shop at: SBC |
Monday, May 18, 2020
Friendship Blooms with Joy Clair Designs
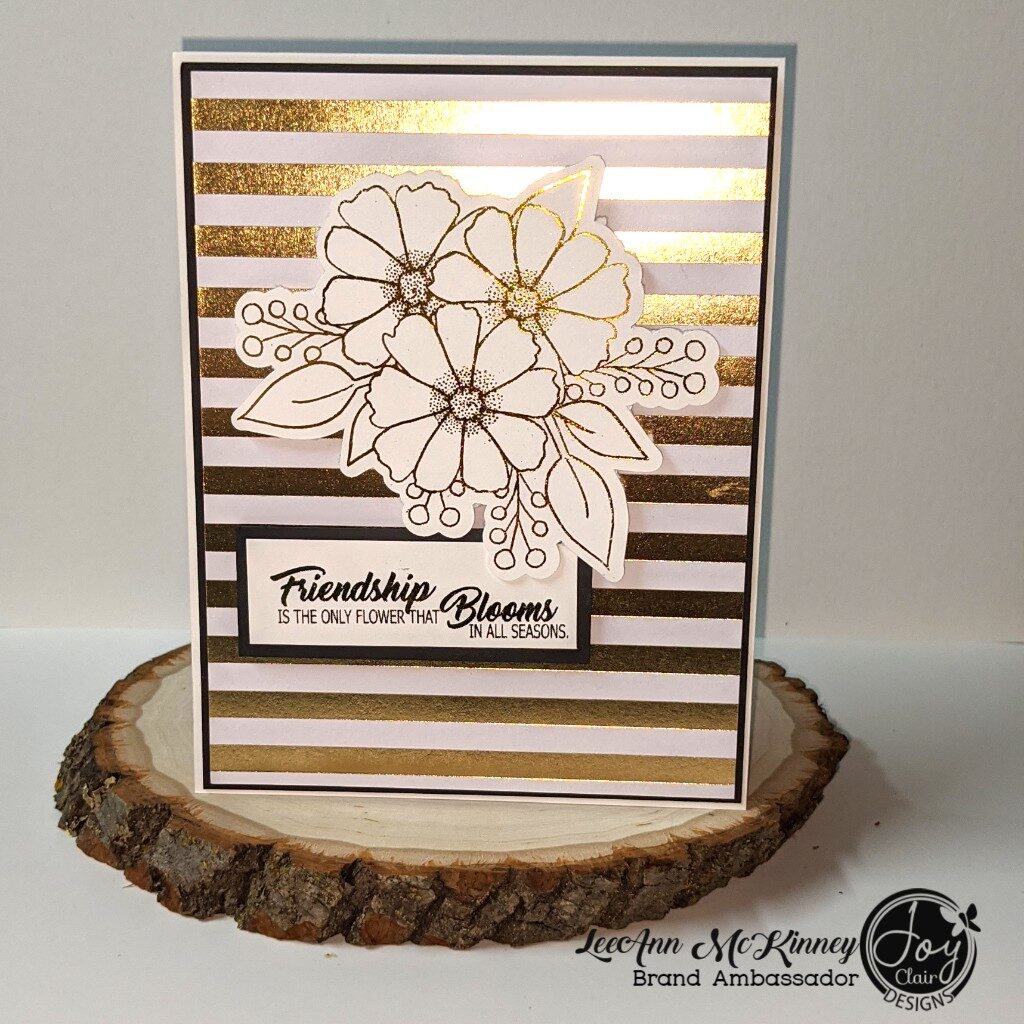
Greetings friends and fellow crafters, LeeAnn here with a super shiny friendship card I made using Joy Clair Designs, Floral Joy digital stamp set.
I'm not sure if you have read this in the past however, I just love working with digital stamps. The ability to maneuver them around, flip flop them, resize them and use them how you like. Sentiments can be make smaller or larger and I just love it.
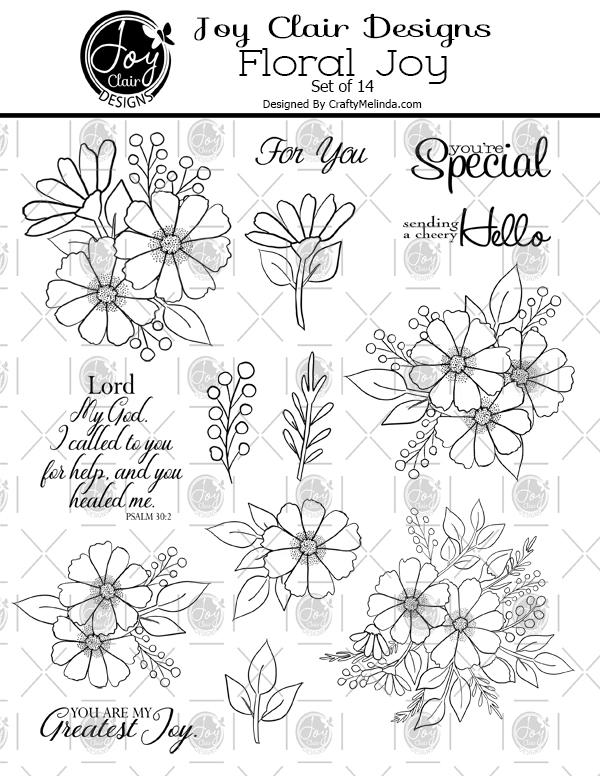
For today's card, I printed the set on 110lb White Recollections Cardstock using my Brother Laser printer.
To print on this thick of cardstock I use the manual feed in the front of the machine without problems.
The Brother Scan N Cut to cut out the images, and left a .04 border around each.
To create my focal points, I warmed up my Heidi Swapp Mini Minc and put the image and Gold Minc Foil in the transfer sheet.
This set was then run it though the Minc and after a quick burnishing, peeled the foil sheet back and Boom.
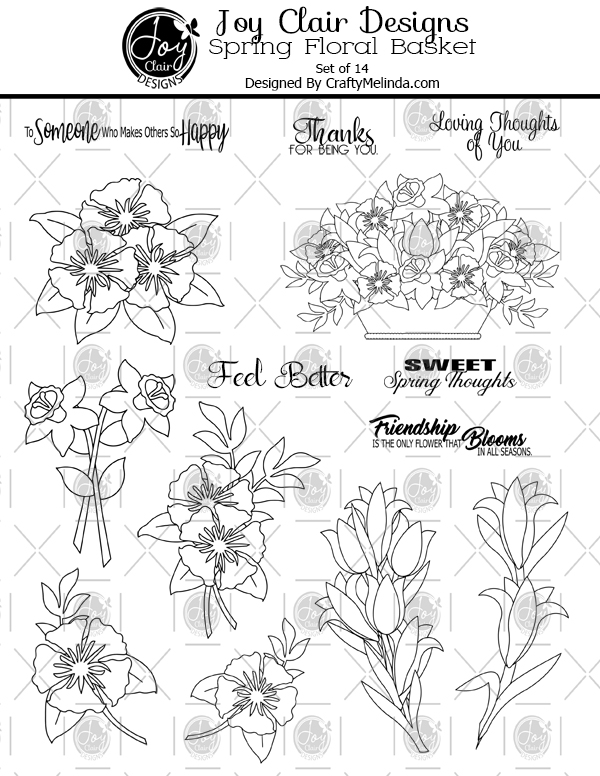
The focal image is BEAUTIFUL The same foiling method was completed with the sentiment I wanted to use which came from a different image set... Spring Floral Basket.
The sentiment and main panel are layered on black cardstock. My back panel is a Gold and White sheet of cardstock from DCWV's Gold Foil Mat Stack. Nuvo Liquid glue was used to adhere the panels together, and Foam adhesive to adhere the flower image and sentiment.
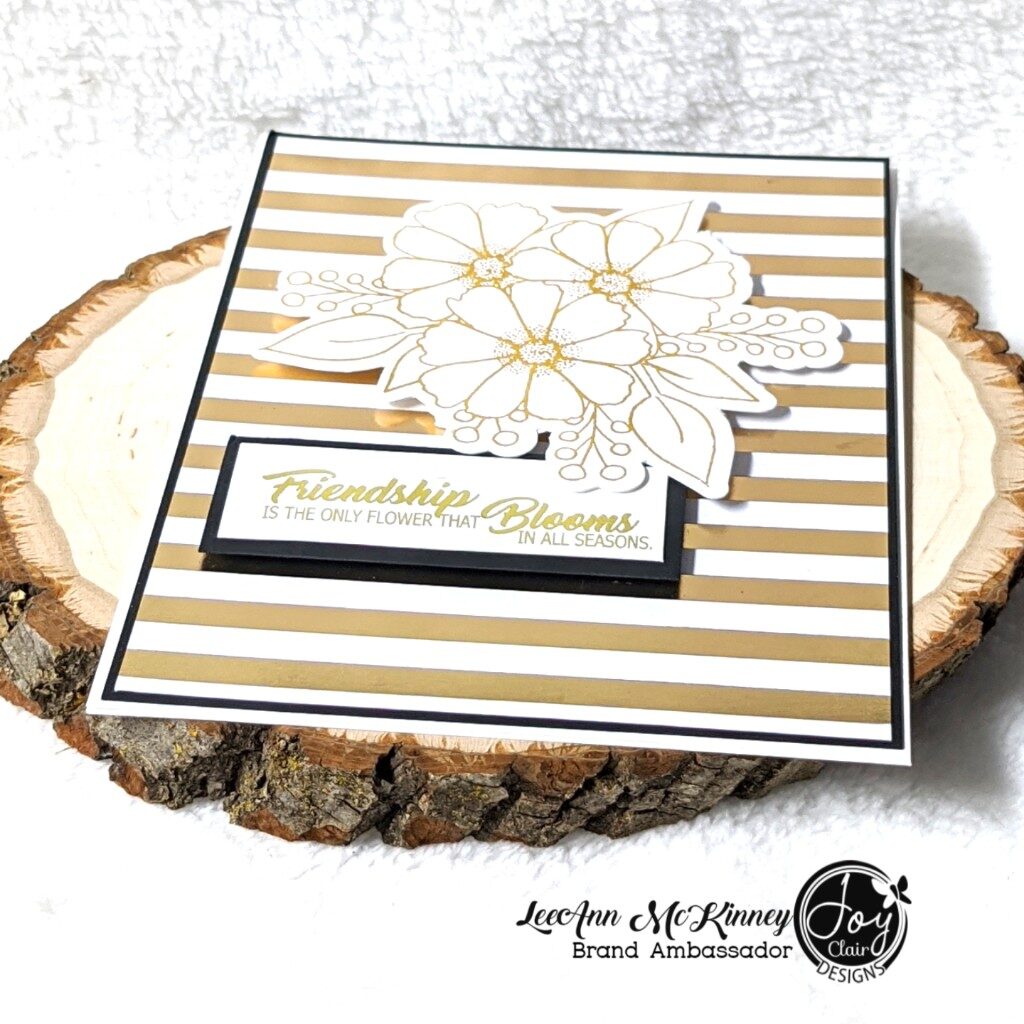
I just love how this angle shows all the foiling. and layers.
Thank you so much for stopping by!. Be sure to sign up for Joy Clair Designs newsletters to receive notifications of new releases, sales and exclusive offers to subscribers. You can also follow Joy Clair Designs on Facebook Page, Joy Clair Stamp Projects Group Facebook Group, Color by Faith Bible Journaling Facebook Group, Instagram , Twitter, Pinterest
Affiliate links are used at no extra cost to you. This helps me support my crafty life!!!

I'm not sure if you have read this in the past however, I just love working with digital stamps. The ability to maneuver them around, flip flop them, resize them and use them how you like. Sentiments can be make smaller or larger and I just love it.

For today's card, I printed the set on 110lb White Recollections Cardstock using my Brother Laser printer.
To print on this thick of cardstock I use the manual feed in the front of the machine without problems.
The Brother Scan N Cut to cut out the images, and left a .04 border around each.
To create my focal points, I warmed up my Heidi Swapp Mini Minc and put the image and Gold Minc Foil in the transfer sheet.
This set was then run it though the Minc and after a quick burnishing, peeled the foil sheet back and Boom.
The focal image is BEAUTIFUL The same foiling method was completed with the sentiment I wanted to use which came from a different image set... Spring Floral Basket.

The sentiment and main panel are layered on black cardstock. My back panel is a Gold and White sheet of cardstock from DCWV's Gold Foil Mat Stack. Nuvo Liquid glue was used to adhere the panels together, and Foam adhesive to adhere the flower image and sentiment.

I just love how this angle shows all the foiling. and layers.
Thank you so much for stopping by!. Be sure to sign up for Joy Clair Designs newsletters to receive notifications of new releases, sales and exclusive offers to subscribers. You can also follow Joy Clair Designs on Facebook Page, Joy Clair Stamp Projects Group Facebook Group, Color by Faith Bible Journaling Facebook Group, Instagram , Twitter, Pinterest
Affiliate links are used at no extra cost to you. This helps me support my crafty life!!!
 Nuvo Deluxe Adhesive Shop at: KS |  Recollections 110 lb Cardstock Shop at: MISC |  Recollections 65 lb Cardstock Shop at: MISC |  Crafty Foam Tape Shop at: JCD |  Spring Floral Basket Digital Stamp Set Shop at: JCD |
 Floral Joy Digital Stamp Set Shop at: JCD |  Heidi Swapp Mini Minc Shop at: SBC |  Heidi Swapp Gold Foil Shop at: SBC |
Sunday, May 17, 2020
CASE The Fellow Blogger Hop
Greetings friends and fellow crafters, it's LeeAnn and today I am participating in a just for fun hop, where the participants each chose a fellow crafter signed up for the hop and are CASEing a card of theirs.
Affiliate links are used at no extra cost to you. This helps me support my crafty life!!!
For my project I chose to CASE my friend Donna... she and I have been online friends since my first real design team back in 2016, we have met in real life twice when she came down to FL on vacation, and wow did we have fun both times. SO... the project I chose to CASE is:
This was on Donna's blog back in June 2019 HERE
I love this card, how the roses look so real, and the framing is just perfection. SO... With that I changed things a little and made it my own...
Of course I had to make this a shaker card. I used the GinaK designs Peaceful Roses stamp set image, and then the sentiment came from the Hero Arts & Gina K Friendship Blooms Collaboration stamp set.
I stamped on Vellum using GinaK Amalgam Ink and colored using Karin Brushmarker Pro for the flowers and Zig Clean Color Real Brush Markers for the Leaves. I used a Spectrum Noir Clear Glitter Brush Pen for blending and sparkle.
I used the Katscrappiness Woodgrain Frame die to make my shaker frame. I cut 6 frames from Dusty Rose cardstock and the top layer is Rinea Foil Paper. I know Purple is Donna's favorite color so that is where the color inspiration came from.
When the card is opened, you will see on the left that the panel is clear, leaving way for the recipient to enjoy the shaker element from the inside as well. The Acetate is a 4.25x5.5" panel from Katscrappiness, and then I used the KatScrappiness Embossed Edge Nesting Dies to cut that inside white frame to showcase the shaker element. The out from that frame is attached to the opposite panel for writing to the recipient.
I hope you have enjoyed this project today. Please do a search for #casethefellowcreator for the blogs and youtube for those having fun in this hop.
 Nuvo Deluxe Adhesive Shop at: KS |
 Recollections 110 lb Cardstock Shop at: MISC |
 Recollections 65 lb Cardstock Shop at: MISC |
 On Point Glue Shop at: IC |
 Wood Grain Frame Shop at: KS |
 Embossed Edge Rectangle Dies Shop at: KS |
 Acetate Shop at: KS |
 Score Tape Shop at: KS |
 GinaK Designs Peaceful Roses Shop at: MISC | |
 Rinea Gold/Violet Foil Paper Shop at: MISC |
 Karin Brush Marker Pro Flower Set Shop at: AZ |
 Zig Clean Color Real Brush Pens Shop at: AZ |
Subscribe to:
Posts (Atom)


