Hi there friends and fellow crafters. Welcome back to Day 2 of the Under The Sea hop, today's Hashtag is #Fridayunderthesea Be sure to look for this on all your social media.
Today was another quite easy card, and I had fun with it.
Recollections White 110 lb cardstock is used to make this 4.25" x 5.5" top folding card base.
Black layer is Recollections 65 lb cardstock cut to 4" x 5.25" adhered using tape runner
Polka Dot Layer is from Echo Park's Let's Be Mermaids 6"x 6" paper pad and cut to 3.75" x 4"
The blue round layer is adhesive backed fun foam cut with a 3.5" circle die, and spritzed with Shimmer Spray.
The ephemera including sentiment strip is all from the Echo Park "Let's Be Mermaids". The 12"x 12" set came with these as stickers.
I hope you have enjoyed this project. Remember today's hashtag is #Fridayunderthesea
Greetings friends and fellow crafters, LeeAnn here with the new release Blog Hop for Joy Clair Designs. Today I am featuring the new digital stamp set Pencil Me.
I had so much fun with this set, and here is how I made it.
Using Photoshop I separated the images and sentiments into their own files.
I then opened a new canvas and added the pencil along with sentiments in the arrangement I wanted.
The page was printed using my Epson Color Printer on Hammer-mill 80 lb Premium Color Copy Cover
I trimmed the panel down to a more manageable size, and used my Embossed Edge Slimline Die to cut that panel with my Vagabond 2.
Using Ohuhu Alcohol Markers I colored in the pencils in Rainbow order.
I layered up the panels on black Recollections 65 lb cardstock and then a Rainbow Stripe Paper Studio Cardstock, and all was adhered to a 6.5" x 8" panel scored at 3.25" to make the card base cut from Recollections 110 lb cardstock and all adhered using a tape runner.
Now is time to hop visiting the designers blogs and as usual, you will have the opportunity to win with us!
All you have to do to enter to win is to leave a comment answering the question below:
You have until Sunday, August 2nd at 11:59 pm EST to post a comment and be to eligible to win one of the two $15.00 gift cards from Joy Clair Designs, valid for stamps and Digital Sets. Only one comment per person please. Two randomly selected winners will be announced on Joy Clair Designs Blog on August 12th. Thank you for joining Joy Clair Designs August New Release Blog Hops and best of luck with the contest!
Hi there friends and fellow crafters, LeeAnn here and after celebrating Christmas in July for the past week, I'm going back to my happy place, Under The Sea!!! This is a 3 day Hashtag Driven Hop that I am participating in with friends from the Handmade Happiness Facebook Group. We will have different projects each day, with a new Hashtag each day as well. Today's hashtag for the hop is #THURSDAYUNDERTHESEA
Some will be doing videos, some Instagram or Blog only. I will be posting on Blog and Instagram. And now for my project.
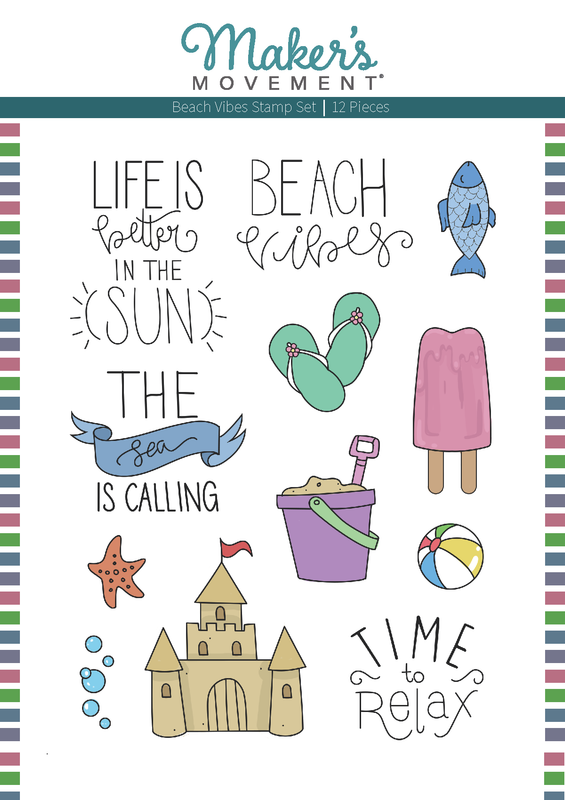
Today I am using this adorable stamp set from The Maker's Movement. The set is called Beach Vibes, and I'm having fun it.
This was probably the easiest card I have made in a long time. And here is how it was done
First I knew I had this pretty paper Iridescent Shimmer Paper in my scrap box, and had to find it.
I added double side adhesive to the back of the paper, first to make it a little stiffer to work with, and second because i knew I was going to adhere it to a black panel.
The panel was cut to 3.75" x 5" and adhered to the black panel which is 4" x 5.25".
These panels were then adhered using tape runner, to a 4.25" x 5.5" card base. I use Recollection 110 lb Cardstock for my bases currently, and am quite happy with it.
Using a stamp platform, I stamped the sentiment at the top of my panel using VersaFine Clair in Nocturne.
I used an acrylic block to stamp the 3 cute fish and bubbles also using the VersaFine Clair in Nocturne.
After allowing the ink to dry, I used Nuvo Orange Marmalade Jewel Drops to add color to the fish, and Nuvo White Blizzard Glitter Drops to the bubbles.
After allowing to dry for a few hours my photos were taken and project was complete.
Please stop over at The Makers Movement where there is a buy 2 Get 1 Free sale going on until July 31.
Today's hashtag for the hop is #THURSDAYUNDERTHESEA
Greetings friends and fellow crafters, today along with some of my crafty friends in the Same Set Syndrome event, are playing with stamp sets from Not 2 Shabby Shop. So hop along and see the fun we are having.
I cut my black and scalloped edge layers with dies from KatScrappiness
For the Scalloped layer, I used post it tape to mask off the edges so my ink blending would stay within the stitched border.
Using Blueprint Sketch and Tumbled Glass Distress Oxide inks I inked up this panel
Position a Tim Holtz Splash Stencil over the panel and Blend in Mermaid Lagoon.
Spritz this panel with Sheer Shimmer Spritz and set aside to dry.
Moving over to the stamp set, I stamped out the Kitty, Puppy, Castle, Sun and Starfish using Memento Tuxedo Black ink and cut the images with my Scan N Cut.
The images were colored using Ohuhu Alcohol Markers.
All images except the Castle were adhered using Clear Foam Squares, they are really thin and give just enough of a lift to slightly add dimension. This is how the small shadow was achieved to the lower side of the images.
The Castle was adhered using a tape runner with only the flag adhered with the clear foam square.
I did purposely leave the flag white... I am surrendering... I want to go to the water park and float all day in the Lazy River, however with the C19, that isn't happening...
SO, hop on along and visit Maritza over on Instagram... HERE
Greetings friends and fellow crafters. LeeAnn here with Joy Clair Designs and two fun Christmas Tags I made using Dog Gone Christmas Stamp Set. You can use this link to see the other Designers/Ambassador's creations
You can use code TEAMTINY20 for a 20% discount at the Joy Clair Store, discount excludes Last Call, Dies and Stencils.
I had so much fun making these tags and they while so cute were really not that hard... here is a step by step how I made them...
Grab 2 ready made tags out of my stash that fit the pups and sentiments
Using my stamp platform and Memento Tuxedo Black ink stamped out the pups on the tags
Stamped out the same pups on masking paper
Fuzzy cut the masking paper and place over the pups on their tags
Also using Memento Tuxedo Black stamp the Antlers and Santa Caps
Using Peacock Feathers and Lucky Clover Distress Oxides on the ShiTzu pup I ink blended the sky and grass
Using Broken China and Lucky Clover with the Hound Dog ink blend the sky and grass.
Using VersaFine Clair in Nocturne stamp the sentiments. For the ShiTzu I did some stamp surgery and cut the sentiment in two pieces so would fit.
Using Ohuhu Alcohol Markers I colored in the images on the tags.
Deciding I was not quite finished, I added some musical notes from the stamp set to the Hound Dog Tag.
Using Simply White Nuvo Crystal Drops I added the puff ball to the stocking cap.
While looking at the ShiTzu pup I felt he needed something else, so stamped and fuzzy cut the bone with a bow and colored them up, this was added to the tag using foam dimensional.
Thanks for stopping by and seeing my tags, I really love these and I know exactly who will be receiving them this year.
Don't forget!!! You can use code TEAMTINY20 for a 20% discount at the Joy Clair Store, discount excludes Last Call, Dies and Stencils.
Disclosure: The links below are affiliate links. If you decided to use these links to shop, you are supporting today's post writer - thank you! They may receive a small portion of the sale, at no extra cost to you. These products are endorsed by teh author, and we hope you will love them too.
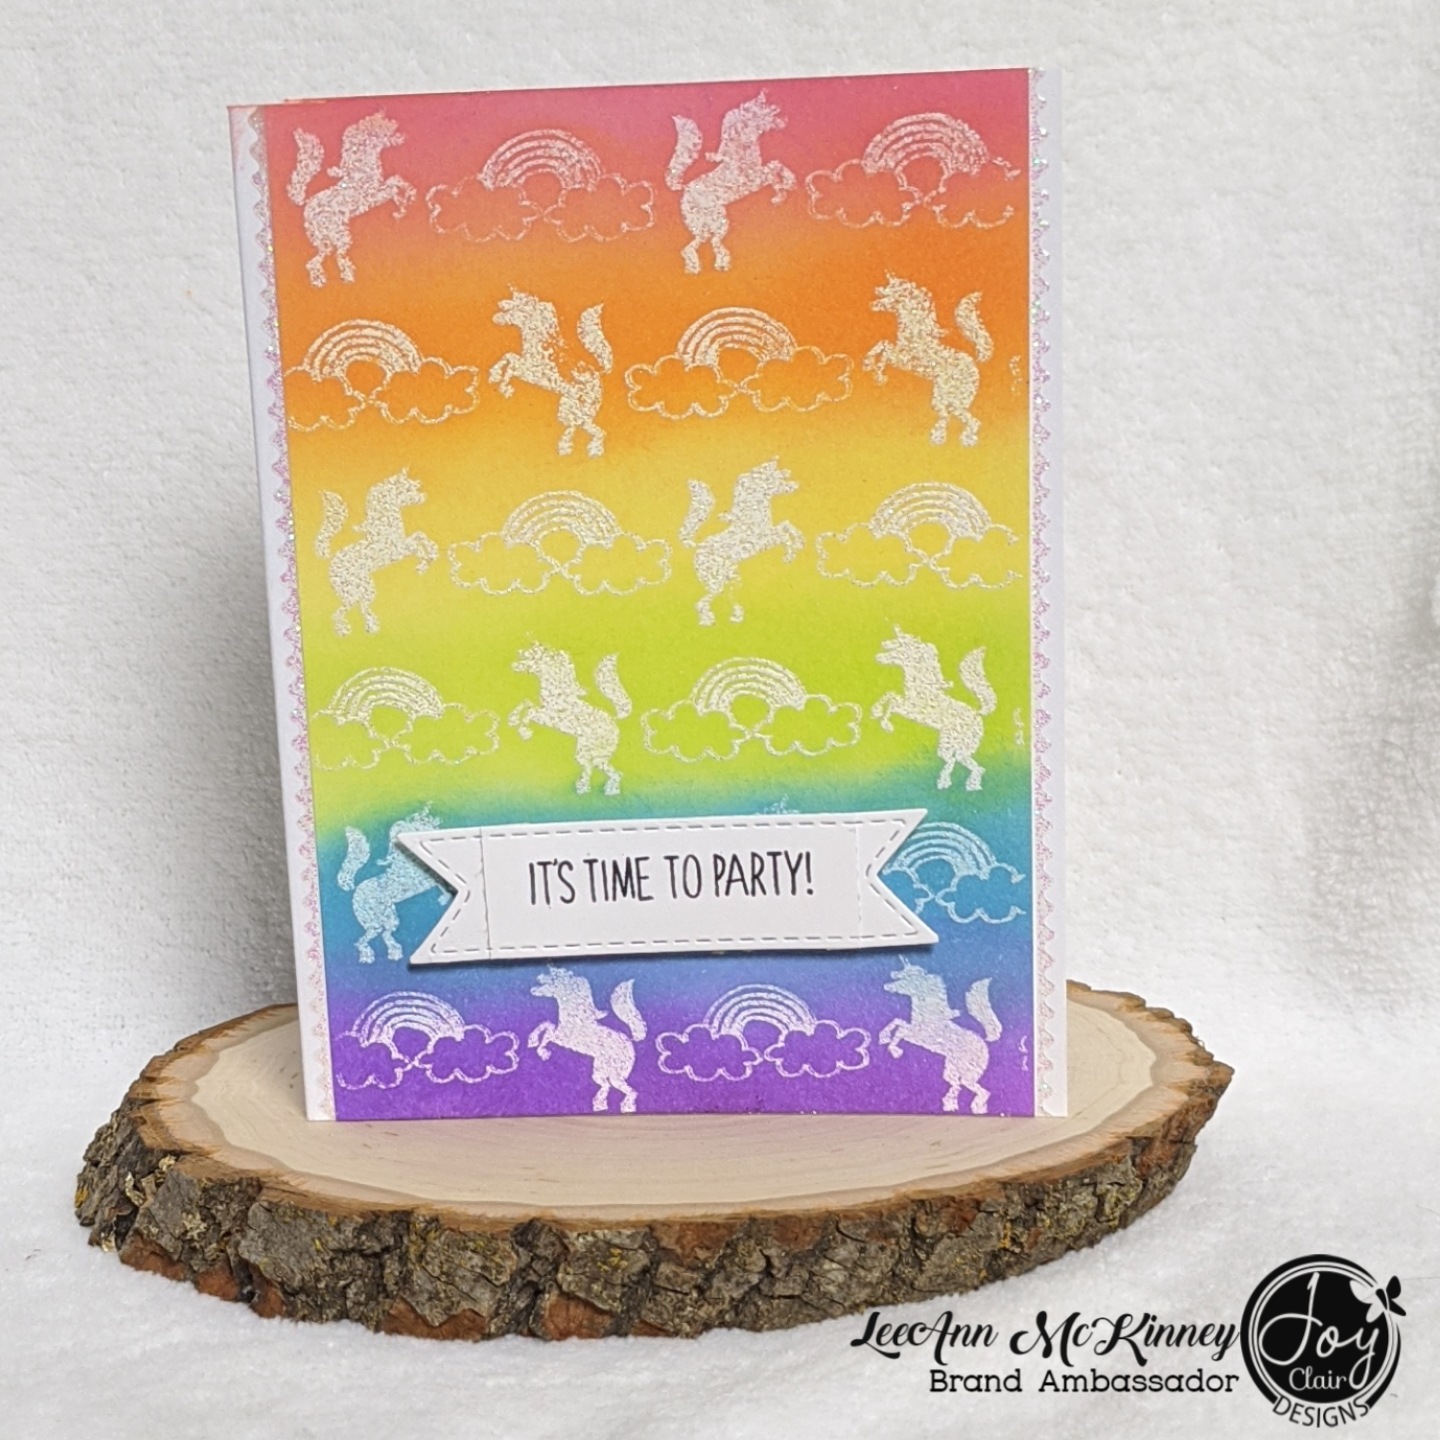
Greetings friends and fellow crafters, it's LeeAnn, I used Unicorn Dance party to make a fun card to share with you.
I had so much fun with this card, let me tell you how.
This really was an easy card to make and did not take long at all. How about making your own Unicorn Dance Party card and upload it to the Joy Clair Stamp Projects Facebook Group. We would sure love to see it.
Greetings friends and fellow crafters. LeeAnn here with my first post with a new team. Stick It Down Challenges. I am new this month on the card sketch team, and so excited. I love working with sketches so this is right up my alley. There are also Single and Double Page Layout Challenges Stick It Down as well. Check them out.
For this month, this is the sketch we are using:
For my project I used a newly released stamp set from Joy Clair Designs called "Big Hugs". This set is available in Clear and Digital Format. I did use the digital format.
I used Photoshop elements and the .png file, spaced out the dog bowls and decided to color them in rainbow order using my Ohuhu Alcohol Markers. I added a few little paw print confetti pieces and after layering on black and then added to my card base my project was complete.
You have until the end of the month to play along with any - or all! - of our sketch challenges. Just post a link to your creation in our sidebar at Stick It Down. If you share on social media, be sure to tag us at #StickItDown.
Greetings friends and fellow crafters. LeeAnn here with a creative post for Create and Inkspire. The question behind this post is "What Inkspires You" as in "What made you fall in love with cardmaking? A technique? A stamp company? A crafter?" ... well... I think back to when I first started crafting.
I want to fly away to see my grandbabies, my daughters are the reason I started crafting in 1998 and the grandbabies are the reason I got back into it in 2014. Today... my card is made using Alcohol inks and Dollar Tree stickers. The black layer of cardstock and the poster board I did my ink blending on also came from Dollar Tree (their poster board works great with Alcohol Inks), and so much cheaper than YUPO!!! I used alcohol blender solution, along with Aqua, Sailboat Blue and Silver Mixatives to create my background. This is such a fun way to play around. My inked layer is 3.75" x 5", with the black layer being 4" x 5.25" and my cardbase is 4.25" x 5.5" top folding, American Sized A2.
You really don't have to read it all if you don't want to, but if you want to know about me and how I got started... well here it is. It was 1998 and my girls were 10, 8 and 7. We lived in Georgia and all the rest of our family and friends that they grew up with lived in Florida. I knew we were going to be moving back to Florida soon, but wanted memories of our life up in Georgia and the friends they had made. Facebook wasn't a think, we had AOL and messenger and otherwise they talked on the phone, imagine that. Anyway, I went to a Scrapbook get together, and bought all the stuff. Came home, started pages, and album and had fun. Then we moved back to Florida. Didn't take long for me to be invited to a Scrapbook get together and I knew I was all for it, I went, bought more stuff and signed up to sell it myself. I had get togethers at our home monthly and we had a great time. Stamping was started out and I said HECK NO, I will not be doing that, I don't want to have 500+ stamps so I have everything I want to say in 5 different fonts, I will just use the computer. Low and behold life happened, and all my product was gone.I was so upset over it, as i had a couple thousand dollars in product and albums and memories gone. THEN, I remarried, and there was a scrapbook superstore in Pigeon Forge, TN where we honeymooned... OMG, that place was big and I spent $80 without thinking. Still no stamps, got home and never touched it. Fast forward 2 years and my daughter said she was pregnant... well that was the end of it. I had to have all the things started looking at Cricut or Cameo... decided on Cameo. Started with the vinyl kit, sentiments, designs and all cut with vinyl or paper only. We lived in a small town, only place to shop was Dollar Tree and Wal-Mart, unless we drove over an hour either way. I started making cards because not all family had computers and facebook. These are the first cards I ever made...
The first card below was for my Aunt, she helped raise me and I owe everything I am to her. She loved the cards I would make for her, and would call me when she received one. Aunt Eloise was 81 when I started making my cards, and sadly we lost her 3 years later.
This second card was for my Mother in Law, she is just the best. She has done so much for my husband and I in the years we have been together and she still has this card now, sitting on the shelf in the living room. She is the first one that ever asked me to make cards for her, I made 100 the next Christmas for her to send out to family and friends. This is the reason I do not make 2 of the same card if at all possible now. LOL.
This last card is one i made for my daughter when she was pregnant with my grandson, my first biological grandchild. I was so proud of this card, she has it in the box with all my grandsons baby keepsakes. Makes me a proud mama and Mimi.
Eventually I did turn to the wild side, it only took about 3 months... August 2014 we went to Virginia for my grandsons birth, yeah I bought some Craigslist packs while up there, a bunch of wood mount stamps, inks, paper, tools and fun. Now, I have a room full of love, I'm happy with my clear stamps, never did get with the wood mount and have given them away. But something I also do from time to time is stroll the craft section and Dollar Tree to see what fun I could have.
Then I found Design Teams, I have been on at least one team since September 2015, and have so loved almost every minute of it. Sometimes getting projects completed at the last second, while other times getting projects done days, weeks and sometimes months before they are due. I love it when I am able to do that, but sometimes that isn't always possible.
Greetings friends and fellow crafters. Hope all is well with you. Today I am playing around with the Joy Clair Designs Out of This World 4" x 6" Clear Stamp Set.
My husbands birthday is today, and we have been trying to figure out what to do. He is a hard person to buy for, and with this pandemic going on, FL numbers are outrageous, we don't really want to go anywhere, so I bought him some fireworks and he can play with them after work tomorrow night down at the lake by the house.
To make today's card, first I stamped out the images from the stamp set that I wanted to use, I then cut them out using my Brother Scan n Cut. I used Ohuhu Alcohol Markers to color my images give them a fun look. I found a panel of pattern paper from a Recollections 6"x 6" paper pad and knew it was perfect. I stamped the sentiment in the center using Versamark Ink, and sprinkled with MBoss Gold embossing powder, hit it with the heat tool to set the powder. I used my EZ Tape Runner to adhere my panels together, and some foam dots to pop the Spaceman and Space Ship up. The stamp set I used and many more can be found at The Joy Clair Store See the rest of the teams posts on our blog Follow us on Pinterest and Instagram
Disclosure: The links below are affiliate links. If you decided to use these links to shop, you are supporting today's post writer - thank you! They may receive a small portion of the sale, at no extra cost to you. These products are endorsed by teh author, and we hope you will love them too.
Greetings friends and fellow crafters, LeeAnn here with my July project for The Makers Movement. I just love this stamp set and knew when I saw it I had a special project in mind. I used the Wish You Were Here stamp set for this card, and the house is from The Beary Christmas Stamp Set
I had so much fun with this, see my 3 daughters all live in different states (hence the 3 hearts). I don't get to see them often, but I think of them all the time. Two of these daughters also have children which makes it even harder. So that is the why I made this card, now to show you the card...
I stamped out the map image using Memento Tuxedo Black Ink. The hearts were stamped using Delicata Pigment Ink in Ruby Red, I chose this has it has a shimmer effect to it. I put the 3 hearts in the general directions of the county where my girls live compared to me, which is the house. And realistically, with no more than 3 highway changes all of my girls could drive straight home and get off the highway 8 miles from the house this just seemed the perfect use for this set. I will be making cards for all 3 and mailing them out.
Thank you for viewing my project today. I had so much fun with this set, and this as well as many other fun sets can be found at The Maker's Movement.
Disclosure: The links below are affiliate links. If you decided to use these links to shop, you are supporting today's post writer - thank you! They may receive a small portion of the sale, at no extra cost to you. These products are endorsed by the author, and we hope you will love them too.