Monday, April 30, 2018

Creative Vision Stamps in the Purple Forest

Greetings friends and fellow crafters. LeeAnn here with my next project from Creative Vision Stamps


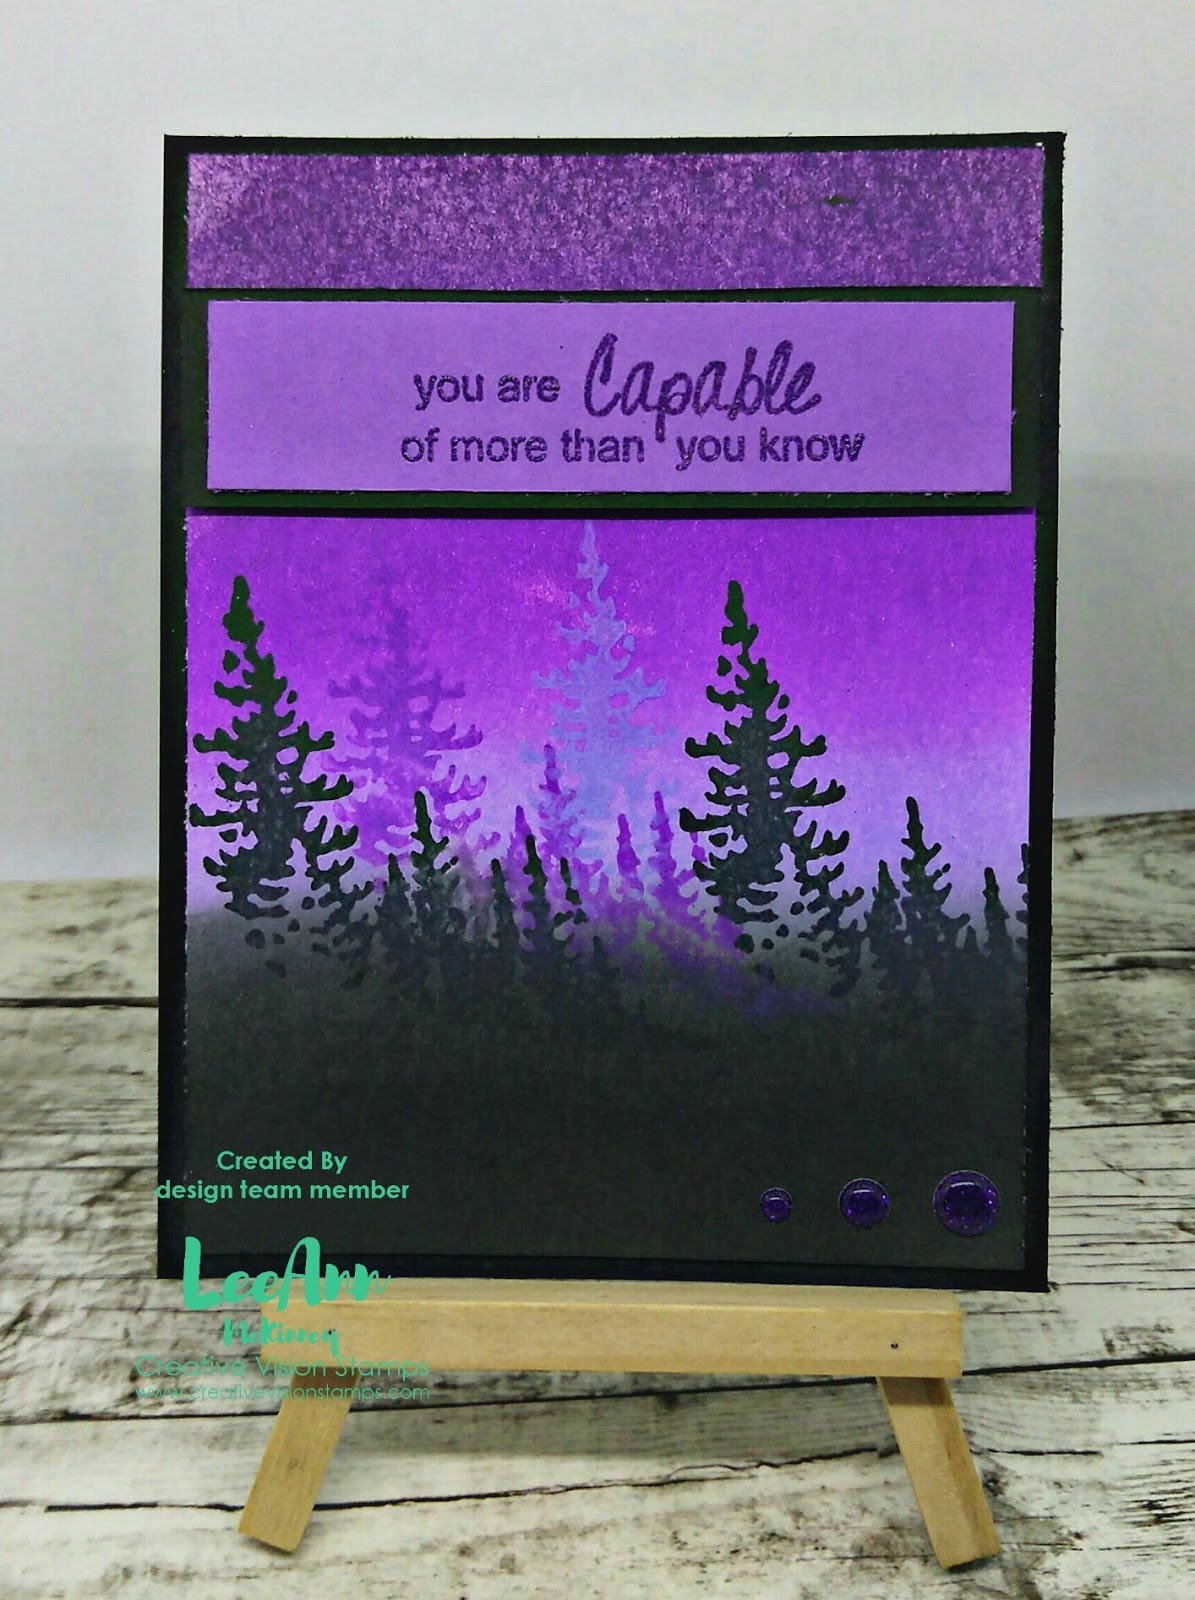
For this project I used Wilted Violet, Shaded Lilac and Black Soot Distress Oxide Inks and Seedless Preserves in Distress Ink to blend my background. After it was dried I used the same three colors to stamp the Forest Silhouette Stamp multiple times in layering fashion to add depth and dimension. 
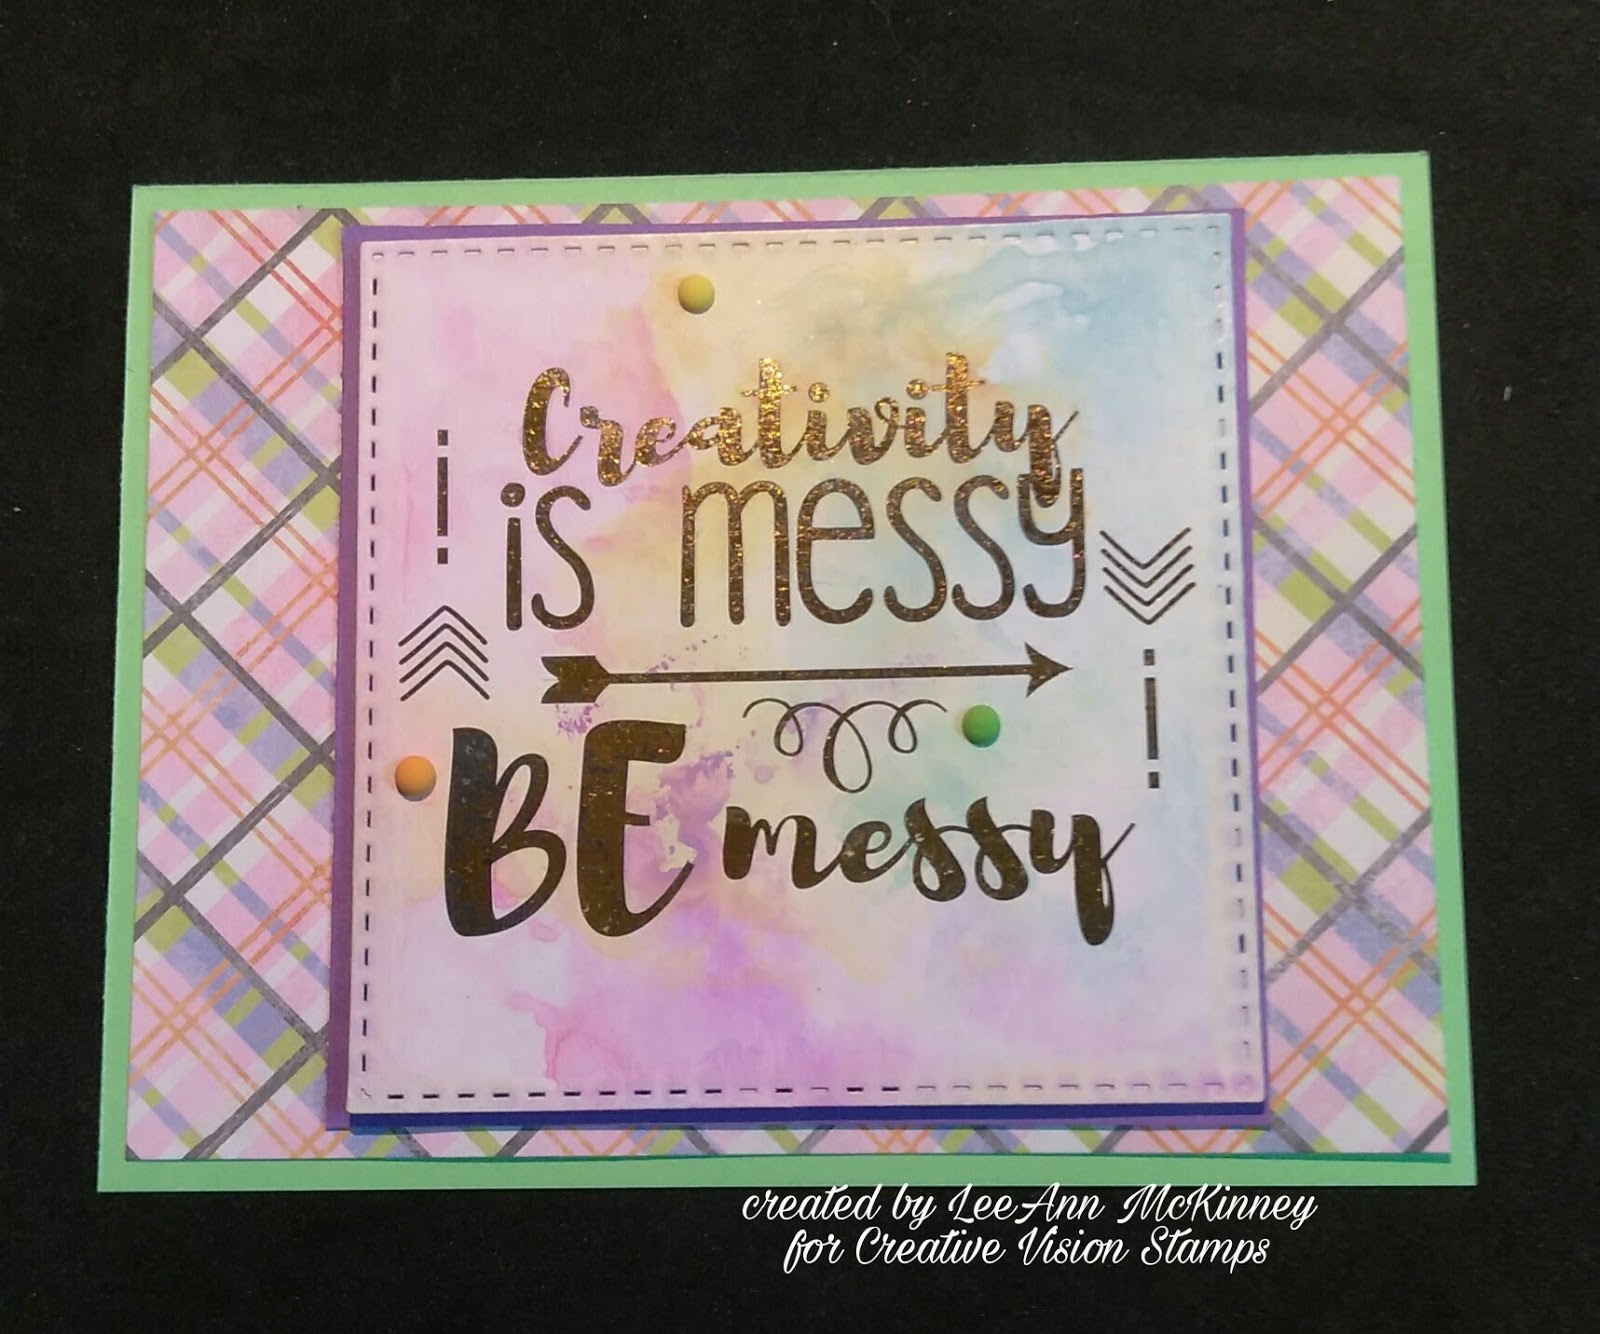
The sentiment is stamped in the Wilted Violet and heat embossed using clear embossing powder. 
Three purple glitter gems were added to the bottom to finish off my project. 

I hope you have enjoyed this project today. Please be sure to take a look over at Creative Vision Stamps and see all the other amazing Foilable products available, as well as the stamps in Clear and Red Rubber.

If you like what I created today, you can shop www.creativevisionstamps.com and use my Design Team discount code to receive 10% off your next order of $20 or more. Enter my code: LEEANN10 at checkout. (It is valid on regular priced items only, doesn't count toward shipping and taxes, and cannot be used with their custom stamp service.).

Sunday, April 29, 2018

We Can't Carry On with Creative Vision Stamps

Greetings friends and fellow crafters. Sharing with you another Creative Vision Stamps project today. 
I shared a different project using this Carry On set a couple weeks ago, while I sat to think about what I wanted to do with this other image. So, here it goes. 

I went through my pattern papers to find the perfect page for this, and I found it in a 7 Gypsies paper pack.

I stamped the small carry on baggage image from the Carry On set, using Versa-fine Black Onyx ink. I used a Burgundy embossing powder and heat set. I then used a Chameleon Burgundy marker to color the luggage and Grass Green to color the tag. Once dry i then went over it with Wink of Stella clear to add a little shimmer. 

I used my Scan N Cut to trim out the image and a background layer from green cardstock. I attached this using double stick tape.

I used a circle die to cut a piece of vellum to place under my image. I knew I wanted the piece of luggage in the lower left corner and adhered it with double stick tape that is under the luggage piece. I then trimmed off the overhang. 

I used a piece of Kraft cardstock, and stamped the sentiment with Versa-mark, and heat embossed using that same Burgundy embossing powder. 

I layered the sentiment panel on Burgundy cardstock and called this project complete. 

I hope you have enjoyed this project today. Please be sure to take a look over at Creative Vision Stamps and see all the other amazing Foilable products available, as well as the stamps in Clear and Red Rubber.

If you like what I created today, you can shop www.creativevisionstamps.com and use my Design Team discount code to receive 10% off your next order of $20 or more. Enter my code: LEEANN10 at checkout. (It is valid on regular priced items only, doesn't count toward shipping and taxes, and cannot be used with their custom stamp service.).

Saturday, April 28, 2018

Hello Beautiful from White Rose Crafts

Greetings friends and fellow crafters. LeeAnn here with the last project I made with the White Rose Crafts Limited Edition Kit. 


I used 2 pattern papers from the kit to form the background along with a cut from the Natural pearlized paper. I stamped in Versamark and heat embossed using Pink embossing powder. I used an oval die and cut a frame from the Mint pearlized paper to surround the image I cut from one of the cut apart panels.
My entire panel is adhered using fun foam on the pink pearlized paper. 
If you want to see what was in this kit. My post is here with the Unboxing Video :)

Buy this kit and subscribe to the next two and save $34.38. You will receive 3 kits for the cost of $74.99... Special.


I hope you have enjoyed this project today. Please see the great products available at the White Rose Crafts online store.

Friday, April 27, 2018

Scrapping For Less Colors of Spring Release Blog Hop


 Hello to all our wonderful Flavor of the Month fans! We are back this month with some wonderful products in our kit! Echo Park, Stampendous, Sunny Studio, and Stamping Bella to name a few! As always we are so very happy to design this and all kits for you and so this month we bring you "The Colors of Spring!" We have our wonderful Design Team and several guest designers joining us again this month so you will definitely want to find inspiration from these amazingly talented ladies. 
Here is my unboxing video for your 
viewing enjoyment:

[youtube=https://www.youtube.com/watch?v=Q3onBJIy9us&w=320&h=266]
Collection 1 Sketch 1
Collection 2 Sketch 2
Collection 3 Sketch 4
Collection 4 Sketch 3


So make sure to check out the Flavor of the Month page to purchase your kit and also make sure that you enter using the Rafflecopter for a chance at some past Flavor of the Month products.
If you've already been hopping with us, you probably came from Lucille's blog. And up next is Tina.


Thursday, April 26, 2018

Term Recap with Evaney's Stamp Designs

Hi there friends and fellow crafters. Today is my final post of the term with Evaney's Stamp Designs, and I wanted to use this opportunity to thank Ashley for the past 4 months, and wish her all the best for the future.
Over the past few months I have had a few projects that I have really enjoyed creating, and wanted to use this post as a recap of those. In case you missed them the first time, I will post the photos and link to the post.


Just A Swingin

Look Up & Sparkle

Hi Earthling

Wild Big Hugs

Wild Big Hugs

Wild Big Hugs
I hope you have enjoyed this project recap today. Please be sure to check out the other fun products at the Evaney's Stamp Designs website. 


Wednesday, April 25, 2018

Creativity is Messy with Creative VIsion Stamps

Greetings friends and fellow crafters, LeeAnn here with Creative Vision Stamps sharing a project I had fun making.


Using the Creativity Foilable Pack and Queen's Crown Foil I started in on the fun. 

I warmed up my Scotch laminator and prepped my project. I cut the panel I want to use from the Creativity pack using a stitched square die.
Once the laminator was hot, I put the panel and a cut from the Queens Crown Foil to a sheet of copy paper folded in half. I ran this through my laminator twice. 

Once this was complete and cooled off, I removed the foil. And went to work on the really fun part. 

I used Distress Oxides in Picked Raspberry, Fossilized Amber, and Broken China smooshed them on a craft mat, spritzed with water and ran my foiled panel through it, I then smooshed it around a bit to get he colors to move. I tapped off with a paper towel and was very pleased with the blending that took place. 

I cut from purple cardsock a panel slightly larger than the foiled panel, and used fun foam to adhere the foil panel. I then went through my stash and found a plaid paper with the same colors, adhered that to a mint green cardstock and the purple panel to the plaid using double stick tape.

I added 3 enamel dots in Lime, Orange and Lemon and my project was complete. 

I hope you have enjoyed this project today. Please be sure to take a look over at Creative Vision Stamps and see all the other amazing Foilable products available, as well as the stamps in Clear and Red Rubber.

If you like what I created today, you can shop www.creativevisionstamps.com and use my Design Team discount code to receive 10% off your next order of $20 or more. Enter my code: LEEANN10 at checkout. (It is valid on regular priced items only, doesn't count toward shipping and taxes, and cannot be used with their custom stamp service.).

Tuesday, April 24, 2018

Scrapping For Less April 2018 Flavor of the Month Sneak Peek

Greetings friends and fellow crafters. LeeAnn here playing with the Scrapping for Less April 2018 Flavor of the Month kit, and had to bring you a sneak peek.

I really had a fun time making this card, so much so that I tore it apart and redid it 5 times. Hope you enjoyed it.
Come back Saturday for the April 2018 Release Blog Hop. In the mean time, you can jump over to the Scrapping For Less site and reserve your April kit now!!!

Monday, April 23, 2018

The 3 Bare Trees with Creative Vision Stamps

Greetings friends and fellow crafters, LeeAnn here with a project for Creative Vision Stamps that as soon as I saw this set in my package I knew I had to do. 

Using the 3 Bare Tree's rubber stamp set, I inked the image up with Nuvo Acorn Brown and Safari Green Hybrid Inks. I then used Nuvo clear embossing powder to add a little shine. I then went back in with the same stamp and extended the land lines on both sides of the image to complete the look. I embossed that in clear as well.

I went through my pattern paper and found this white and yellow diagonal sheet, used brown/white and yellow/white Bakers Twine, I wrapped my tree panel twice, tied a bow in the middle and was happy. 

My layers are adhered with double stick tape.

I hope you have enjoyed this project today. Please be sure to take a look over at Creative Vision Stamps and see all the other amazing Foilable products available, as well as the stamps in Clear and Red Rubber.

If you like what I created today, you can shop www.creativevisionstamps.com and use my Design Team discount code to receive 10% off your next order of $20 or more. Enter my code: LEEANN10 at checkout. (It is valid on regular priced items only, doesn't count toward shipping and taxes, and cannot be used with their custom stamp service.).

Sunday, April 22, 2018

It's All shits and giggles with Creative Vision Stamps

Greetings friends and fellow crafters. LeeAnn here with a fun foiling project for Creative Vision Stamps.

For this project I used Foilable pack Geometric 10. Seaside Cabana Foil, and Shit's and Giggles Rubber Stamp Set. 

After warming up my Scotch Laminator I added my Geometric sheet and the Seaside Cabana Foil to a folded piece of copy paper, which I used as a carrier sheet. I ran this through twice an then set aside to cool.

I took a Wonky Stitched Die and ran it through my Big Shot with a piece of 110 lb Recollections white cardstock.

I used my Stamp Platform to line up my stamps and stamped with Acorn Brown Nuvo Hybrid Ink. 

Attaching my layers I used double sided tape for adhering the Geometric panel to the Pink Base. I used fun foam to attach the Wonky Stitched Panel to the Geometric panel.

The finishing touches were 2 stickers one in pink and one in blue of baby pj's, and then 3 glitter enamel dots 2 pink and 2 blue.

I hope you have enjoyed this project today. Please be sure to take a look over at Creative Vision Stamps and see all the other amazing Foilable products available, as well as the stamps in Clear and Red Rubber.

If you like what I created today, you can shop www.creativevisionstamps.com and use my Design Team discount code to receive 10% off your next order of $20 or more. Enter my code: LEEANN10 at checkout. (It is valid on regular priced items only, doesn't count toward shipping and taxes, and cannot be used with their custom stamp service.).

Friday, April 20, 2018

MOM using the White Rose Crafts May Kit

Greetings friends and fellow crafters. LeeAnn here today with another project using the White Rose Crafts May Card Kit

Using paper from the kit, I had a lot of fun making this card. Thinking with Mother's Day coming in the US in just a few weeks, this would be a good idea, and easy for anyone to replicate. 
I used Lawn Fawn Alphabet Dies called Quinn's Capital ABC's to die cut the word MOM out of the bottom portion of my top panel, along with a piece of fun foam, I then after adhering my panels together, I affixed the fun foam letters in the proper holes, and then attached the paper pieces to the top of that. 
This really did make for a quick and easy card. 

A photo of the contents from the kit:

I hope you have enjoyed this projects today. Please see the great products available at the White Rose Crafts online store.

Thursday, April 19, 2018

Be Sure To Clown Around with Evaney's Stamp Designs

Greetings friends and fellow crafters, LeeAnn here with my Friday post for Evaney's Stamp Designs. 

For today's project I used the Party Clown die set and the Circus Confetti Bliss Sequin Mix.

I will say I am not big on clowns, however this one was fun to use, and I knew the pieces could be used for more than just the intended purpose.
Using various colors of cardstock I cut the different pieces out. When I cut the main section for the head, mouth and nose, I cut through fun foam at the same time as I knew I wanted to make a shaker for the nose section. 
My background is done with Broken China Distress Oxide on watercolor paper. 

I hope you have enjoyed this project today. Please be sure to check out the other fun products at the Evaney's Stamp Designs website. 


Wednesday, April 18, 2018

Stay! Don't Go! With Creative Vision Stamps

Greetings friends and fellow crafters, LeeAnn here today with a project I made for Creative Vision Stamps

In making this project I used the "Carry On" clear stamp set available at Creative Vision Stamps. The process was as follows:
1. I stamped the stacked luggage from the stamp set with Versafine Onyx Black ink and heat set it using Clear embossing powder. 
2. I cut the image using my Scan N Cut leaving a small border, and then while the shape was on the machine I increased the size of the border and cut from Kraft cardstock.
3. I colored the stacked luggage image using Chameleon markers, I love how the markers leave a graduated blended design as the color changes. 
4. The background paper for my project is from Doodlebug Designs "Flea Market" 6" x 6" paper pad, and is the front and back of one page.
5. The sentiment is stamped on white 110 lb cardstock, die cut and layered on brown to match the other layers. I did heat emboss using Copper Embossing Powder. 
6. The sentiment tags are attached using brads. All layers are added using double stick tape except the luggage background page in which I used fun foam.

Items used in this project:
Carry On
I hope you have enjoyed this project today. Please be sure to take a look over at Creative Vision Stamps and see all the other amazing Foilable products available, as well as the stamps in Clear and Red Rubber.


If you like what I created today, you can shop www.creativevisionstamps.com and use my Design Team discount code to receive 10% off your next order of $20 or more. Enter my code: LEEANN10 at checkout. (It is valid on regular priced items only, doesn't count toward shipping and taxes, and cannot be used with their custom stamp service.)

Sunday, April 15, 2018

Hello, Sunset Giraffe with Creative Vision Stamps

Greetings friends and fellow crafters. LeeAnn here with my first post with the Creative Vision Stamps design team. 
 Using the Giraffe from the Animals Foilables set and Pretty Penny Foil, I put this project together. The steps to make this project are as follows:
1. Turn on my laminator (Scotch) and let it heat up while I moved ahead to my background. 
2. Using Distress Oxide Inks in Fossilized Amber, Spiced Marmalade and Picked Raspberry I blended my sunset background on Bristol Smooth Paper. 
3. I used a circle die to cut the sunset out and affixed it to my black background piece with double side tape.
4. By this time my laminator was nice and hot and I folded a piece of copy paper in half, put in the Toner Sheet from Foilables 58 and a 4" section of the Pretty Penny foil.

5. When the page came through my laminator I turned over and sent it through again upside down. 
6. Once it came through, I allowed a few minutes to cool and peeled back the foil and it was beautiful. 
7. I then put the Giraffe page in the same copy paper and the negative of the same foil Pretty Penny sheet so I could have the pretty swirls.

8. I ran this through my laminator twice as well, so that the pretty swirls were now attached to the giraffe like spots. 

9. I then cut out the giraffe using my Scan n Cut.
10. I used foam adhesive and clear dots to attach the giraffe to my background piece, and after diecutting Hello out of Coral paper, I attached using my Xyron X. 
11. Final step on this project was to add 3 yellow matte enamel dots in the upper left corner. 

Recap of items used in this project:
Animals Foilables

Pretty Penny Foil
I hope you have enjoyed this project today. Please be sure to take a look over at Creative Vision Stamps and see all the other amazing Foilable products available, as well as the stamps in Clear and Red Rubber.

If you like what I created today, you can shop www.creativevisionstamps.com and use my Design Team discount code to receive 10% off your next order of $20 or more. Enter my code: LEEANN10 at checkout. (It is valid on regular priced items only, doesn't count toward shipping and taxes, and cannot be used with their custom stamp service.)


Friday, April 13, 2018

Butterfly Love with White Rose Crafts

Greetings friends and fellow crafters. Spring is here and I am thinking about the outdoor critters I love, like butterflies.


For this project I used a pattern paper from the Ultimate Crafts 6"x6" paper pad called L'aquarelle Designs. my Butterfly is from their stamp set called Spread Your Wings, in that same line. The sentiment is from Find it Trading's "Butterfly"stamp set.

To be honest this was quite an easy card to make, I started off with a pre-made card base in Dusty Rose. I then found the pattern paper I wanted to use and made a 4" x 5.25" layer and rounded the upper left and lower right corners with my corner chomper.
I cut the next two layers of rose and the alternate side of my pattern paper with stitched ticket dies from my stash.
I used my stamping platform, (I have the full size but the travel size is available for pre-order now), to stamp the sentiment using Scrapberry ink in Green and Pink.
The butterfly stamp I stamped in Memento Tuxedo Black ink and cut with my Scan n Cut. I then used Spectrum Noir Markers in Gt3, JG1, AP1 and AP2 to color the image and then used Vintage Photo Distress Oxide around the edges. Once it was for sure dry I used Wink of Stella on the butterfly to add a little shimmer.
My top layer is adhered using double stick tape. I used foam squares to attach the sentiment panel to the topper, after adhering the sentiment with double stick tape. 

I hope you have enjoyed this projects today. Please see the great products available at the White Rose Crafts online store.

Destash going on... check it out... Joy Clair Color By Faith listed now!!!

Joy Clair Color By Faith STAMPS DESTASH...

Unfortunately  my husband lost his job, and we have a car payment ocming up. In order to help out I have decided to destash some stamps that I have accumulated over the past 2 years from an amazing design team i was on. If you click the link below you can see what the stamps do look like as well as samples of the sets being used.
Please comment with the stamps you would like and your email; I will send an invoice for the stamps and shipping. Thank you so much

Joy Clair Color By Faith Sets 
4" x 6" $7 + Shipping
A Child is Born
All Things Possible
Away in a Manger
Be a Flamingo
Bible Planner
Born Again Sentiments
Born is the King
Child of the King
Faith Quotes
Flawless
Give Thanks
God's Focus
God's Love
God's Treasure
Grow with Faith
He Has Risen
In God's Time
Jesus is My Jam
John 3:16
Joyful Noise
Let the Light Shine
Letter to God
Lift Me Up
Lion and Lamb
My Redeemer
Prayer Warrior
Salt and Light
Seeds of Faith
Send Me
Song of Solomon
Under Construction
Worship Him

6"x8" sets
$12 + Shipping
Armor of God
Be Brave
Books of the Bible
Designer Labels
Stained Glass
Prayer Words

Sparkle Blends Birthday Blog Hop

Greetings friends and fellow crafters. LeeAnn here today with the Sparkle Blends Blog Hop. I was so happy when Amber invited me to participate. I love making shaker cards, so of course I said yes.
For today's project the paper pad came from Michael's, it is the Craft Smith 6"x6" paper pad called 
"Llama Love".
I used triangle stitched rectangle dies from my stash and the Birthday Bash Sparkle Blends that is part of the April Release for the shaker elements.

Doodles Paper Playground <----You are Here
Mimi's Crafty Abyss <--- YOU ARE HERE
You should have come here from Alison's Blog
And up next is 

After visiting all blogs and commenting, please enter the Rafflecopter
Prizes:
  • Grand Prize: One lucky commenter who comments on all participating blogs in the hop will receive full sized packages of all 8 blends in the April release!
  • Second Prize: One lucky commenter who comments on all participating blogs in the hop will receive a Birthday Themed prize pack, including a full sized package of Birthday Bash!
  • Individual Blog Prizes: On each leg of the hop, I have asked the designers to choose their favorite blend from this release. Those blends will be given away to one lucky commenter on each of their hop blog posts!
Corresponding White Rose Crafts Promos:Free Shipping - No code necessary - Friday April 13 - Monday April 16 at 11:59PM Eastern 20% off everything in the Shaker Cards section of the store: https://whiterosecraftsllc.com/t/shaker-cards - With code: SPARKLE - Friday April 13 - Sunday April 22 at 11:59PM Eastern Rules:
  • You must be at least 18 to enter, and reside in the USA or Canada to be eligible to win.
  • Entries must be received no later than 11:59PM EST 4/16/18
  • Grand Prize Entries must be made through the corresponding Rafflecopter widget, and entrants must comment on all participating blogs to be eligible to win.
  • Individual Blog Winners will be chosen from the comments within the corresponding blog only.
  • Winners will be posted on the Doodles Paper Playground blog and will be notified by email.
  • Winners will have 3 days to provide their address in order to claim their prize. Unclaimed prizes will be redrawn after 3 days, and will go to new winners. No exceptions.
  • This giveaway is not sponsored, affiliated or associated with any other entity and is sponsored solely by Doodles Paper Playground.

Thursday, April 12, 2018

Just a Swinging with Evaney's Stamp Designs

Greetings friends and fellow crafters. LeeAnn here with my Friday project for Evaney's Stamp Designs
I had a lot of fun with this card, as soon as I saw the Step Right Up stamp set, I knew this little lady had to fly across the front of the card.
I stamped and cut the image, then colored with Chameleon markers. They give such a graduated blending that makes them fun to use, as you can get so many colors from one marker. The background paper is from Pebbles "Sunshiny Days" 6"x6" paper pad. 
I used a Lawn Fawn "Slide on over" die to cut the swing track. I affixed the trapeze artist using a brad. 
I used a net die from my stash to get the catch net, and cut down a striped straw to make the poles holding the net. I affixed the net to the "poles" using my glue runner. 
My final touches were to stamp "Happy Birthday" and "Swing for Joy on your special day" using Ink It Up! Turquoise Ink by Darice. This is a quick drying dye ink that allowed me to immediately cut the sentiments using a banner die from my stash.

This video is my little trapeze artist in action:

[youtube=https://www.youtube.com/watch?v=Xt8wM-KkNqo&w=320&h=266]
I hope you have enjoyed this project today. Please be sure to check out the other fun products at the Evaney's Stamp Designs website. 


Tuesday, April 10, 2018

Inspire Dream Create with Pink & Main

Greetings friends and fellow crafters, LeeAnn here with my Design Team project using the Pink & Main “Inspire” stamp set. This set is great and since I do love butterflies I knew was I was going to do right away. First I positioned the stamps on my Tim Holtz Stamp Platform and used the Bouquet Kaleidacolor ink pad to ink up the spray of butterflies, and Onyx Black Versa-fine Ink to make my stamp impressions. Once the Butterflies were stamped at the colors I wanted, I cleaned my stamp and stamped everything again using Versa-mark clear watermarking ink. I followed this up with Clear embossing powder and used my heat tool to set it. I  used Pale Periwinkle and Key Lime Nuvo Jewel Drops, although unfortunately one splotched on me (Desiree I need a Nuvo class)!!! I used paper from the March Flavor of the Month kit to layer my card panel on my base.
Hope you liked my project today. 
Please follow along with  Scrapping For Less on All Social Media Outlets.

Friday, April 6, 2018

You Are Simply Amazing with White Rose Crafts

Greetings friends and fellow crafters, LeeAnn here with a project I made using the first White Rose Crafts Limited Edition card kit that is currently available for shipping. 
Going with the theme of the paper in this kit, "Patchwork of Life", I knew one of my cards had to be a quilted pattern. Using a Gina Marie Die, I cut the pattern in one of the pattern pages, as well as the pink and green shimmer cardstock from the kit. I used a Hero Arts Acetate sheet as the backer for this piece and then foam tape around to add some dimension. The sparkle blends are from the kit. 
I added a strip of the lace along the bottom and the sentiment that came from the stamp set, stamped in Memento Tuxedo Black.

I hope you have enjoyed this project today. Please see the great products available at the White Rose Crafts online store.

Tuesday, April 3, 2018

Scrapping For Less Brain Freeze

Greetings friends and fellow crafters. LeeAnn here with a post using the March Flavor of the Month kit "All About Ice Cream" from Scrapping For Less. 

To make this card I used Black cardstock as the base, and for layering. The rainbow pattern paper is from Pink and Main "Beach Babe" which is part of collection 3. The ice cream cone stamp is from the "Stamping For Less" exclusive in the Banana Split package. 
The inks I used are as follows in order, all Memento Dew Drops.
LadyBug
Tangelo
Cantaloupe
Bamboo Leaves
Bahama Blue
Grape Jelly

I stamped the sentiment with Versafine Onyx Black. 

As of this post the Banana Split level is still available. Please check it out here and get yours while you can!!!

I hope you have enjoyed my project today. Please stop by the Scrapping For Less website and see the items I have highlighted as well as the other awesome items available.