Tuesday, November 28, 2017

Peace on Earth with Joy Clair Stamps

Greetings friends and fellow crafters. LeeAnn here and today I am presenting a project for Joy Clair that I made using the Born is the King stamp set from the November 2017 release.  

  • In making this project I first used StazOn Hydrangea Blue Ink to stamp out the dove first on the Recollections 110 lb cardstock I used as my base, but also on clear repositional contact paper.
  • I fussy cut the dove in the contact paper to use as a mask and attached it over the doc on the cardstock. 
  • I then found a scalloped stencil in my stash and grabbed my Summer Sky Memento Dew Drop. Using a blending tool I inked up my page slowly moving the stencil down starting at the top. 
  • Once I had that part complete I removed the contact paper mask to reveal my un-inked beautiful white dove.
  • Using that same Hydrangea Blue StazOn ink I stamped the sentiment.
  • I mounted this panel on an A2 card base using foam dots and this project was complete.

Thank you for joining us and don't forget to follow on our social media venues to be the first to hear the news about sales, promotions and giveaways!
Thank you so much for stopping by today. Have a wonderful and blessed day!

A Quick Quotes Fall Thank You

Greetings Quick Quotes friends and fellow crafters. LeeAnn here with a Fall Thank You card that I made for my sister in law for having us for Thanksgiving dinner. Granted we do live across the street from each other and eat together at least once a week, but she loves to cook and I love to craft. Works for us.


Anyway... Using paper from the Sonata paper pack, I found this sheet lent itself greatly to fall colors. Using a Tim Holtz leaf die I ran it through my Big Shot and cut the fall leaves twice once to get the initial leaves and again in a page with the paper turned the other way so I could reverse the leaves from the original side they were from.

This was then adhered to a piece of paper from the Serenade paper pack since it did have that green color on one side that I love to see. Not only with green being my favorite color but also because we are in Florida and that is what we see most of the time.
Using Sunset Powderpuff Chalking Ink I stamped out the word Thank You on a piece of Windsong, I cut the ends into a banner and adhered it to the front of the card with foam tape to add dimension.

I hope you have enjoyed my project today. I hope everyone reading this post had a great Thanksgiving with their families and will have a Happy Holiday season to come.

QQ Products Used
Sonata Paper Pack
Serenade Paper Pack
Windsong Paper Pack
Sunset PowderPuff Ink

Monday, November 27, 2017

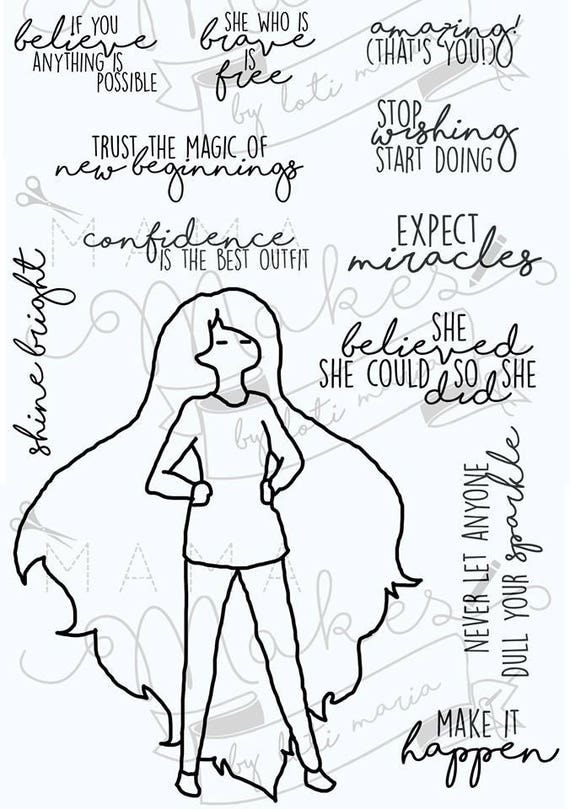
Mama Makes Shine Bright with LeeAnn

Greetings friends and fellow crafters, LeeAnn here with my first post for the Mama Makes Design Team. Mama Makes is a UK based stamp company that is owned and run by Loti Maria Fuster-Bradley and what a great job she is doing with this new company. Loti has a photopolymer stamp machine and make the stamps herself start to finish in her own home, how cool is that? So, I was selected to be a member of this team back in August, and the first allocation of images arrived to me on October 10 due to Loti wanting to wait for the new release to be ready, so today I am bringing you the first project I made with the "CHRLY" collection.  I have 2 stamp sets from this collection so you will see another project shortly, it is made I have to write the post. Today I am focusing on "Shine Bright".


I made this card with my daughter in mind, she left 8 days ago for United States Coast Guard boot camp, away from her husband, children and all the rest of the family for almost 8 weeks. I knew the first time I saw this set I was going to use this sentiment and this card will be off in the mail to her by the time this post goes live.


  • To make this card I used Recollections 110 lb cardstock cut to 4.25" x 11", scored at the 5.5" line and folded over to make a US sized a2 card. 
  • I then used Memento Tuxedo Black ink to stamp the image and sentiment using my Tonic Stamp Press. 
  • I used my Scan n Cut to cut a mask of the image and then adhered the mask to the image so I could use my Summer Sky Fireworks spray from Imagine Crafts to add the background. 
  • After the background was dry I used my Memento Dual Markers to color the image. The colors used were: Rich Cocoa for the pants, Ladybug for the shirt and Dandelion for her hair with Cantaloupe added in for a few highlights. 
I really hope you have enjoyed my project today, I will now write my next post and hope to be back with that soon. Please be sure to check out Mama Makes on Facebook, Instagram, and Twitter.

Saturday, November 25, 2017

Skipping Stones Thank You

Greetings friends and fellow crafters, LeeAnn here today with a Thank you card I have made and would like to share with you.


Today as I was sitting and going through my stamps trying to come up with an idea for this Thank You card, I decided to use a project card from Lori Whitlocks, A Perfect Autumn collection by Echo Park, and the stamp set is Skipping Stones Breathtaking Butterflies.

Breathtaking Butterflies 053
The sentiment is a die from my stash. 

To make my project I first stamped the small solid image butterfly with VersaMark ink and heat embossed using Neon Orange embossing powder. My next step was to stamp the imaged butterfly and used Gold embossing powder, I used my heat cut to melt that as well. 
After this step I used Recollections 110 lb Chocolate Brown cardstock and cut an A2 base. After using my scoring tool to fold over, I sprayed with Neon Orange irRESISTible texture spray. I cut a 4.25 x 3.25 panel from Recollections 110 lb White and mounted my journal card using Tear It! Tape. This was then attached using foam tape. The Thank You sentiment was cut from Recollections 65 lb cardstock in Gold and attached using On Point Glue!
A quick and easy thank you card with a little shimmer and shine. I hope all my US readers have had a wonderful Thanksgiving, and I wish a joyous Holiday season to all in the upcoming month leading up to Christmas, Hanukkah, Kwanzaa and any other holiday you may celebrate.

Thursday, November 16, 2017

Kennedy Grace Creations Inspiring Kindness

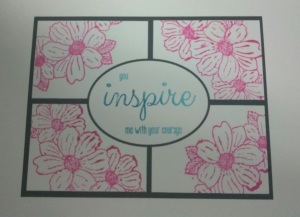
Greetings friends and fellow crafters, LeeAnn here with my second project for November with Kennedy Grace. I was having a little fun on my computer with my Silhouette software and designed this frame design, and used two of our stamp sets (Kindness Medley and Inspire) to complete my project.


  • First I printed this frame design on 110 lb cardstock with my Ink Jet printer. 
  • Next I used my Stamp Press and stamped the flowers from Kindness Medley in each of the corners, while also masking off the opposite boxes so that the flowers did not run into each other. I used Memento Love Letter to stamp the flowers.
  • My next step was to stamp the sentiment in the middle oval from the Inspire stamp set. I used Memento Bahama Blue to stamp the sentiment, varying the strength of touch to leave an ombre' look.

  • From here after all ink was try I went into coloring mode using my Memento markers to color the flowers using Angel Pink, Dandelion, Tangelo, Cantaloupe and New Sprout.
  • My final step was to cut the panel down to 4" x 5.25" and adhering it to an A2 base using Tear it! Tape.


I wanted to use some sequins on this, however the card is being sent to my daughter who is at Coast Guard Boot Camp and sequins and glitter are a big no no.

I hope you have enjoyed my project as much as I enjoyed making it. 

Please be sure to follow the Kennedy Grace Creations blog, facebook, twitter, instagram and pinterest. Our Design Team has great projects to inspire you with our great stamp sets.

Wednesday, November 15, 2017

Joy Clair Inspiration with LeeAnn

Greetings friends and fellow crafters, LeeAnn here with 2 projects using stamps from the newest Joy Clair release. Every time a design team package comes in the mail I get so excited to start playing as I already have visions in my head and sketched out of what I want to do.

The first set for this new release I used was Christmas Cocoa. This set is great with cups, mugs, cookies and candy.

With this set project I decided to go with a clean and simple card. Using a section of cardstock from BoBunny Christmas Collage paper pack I cut it 1" x 4.25". I then Stamped out the mug, cookie, marshmallow topping, candy canes, heart and individual marshmallows on Recollections 110 lb cardstock using Memento Dew Drops. Once I had them all stamped I cut using my Scan n Cut.
I used a section of paper from the same paper pack with a red start pattern, I made a banner flag. Using a piece of Recollections 110 lb cardstock I cut a smaller banner flag and stamped the sentiment Mugs & Kisses in Memento London Fog.
Using foam dots on the mug and Tear It! Tape on the rest I adhered all items down and my project was complete.
===========================
For my second project I stepped back in time to my teen years, tie dye, bright colors and fun. Records were still in style while making way for cassettes and this is where the inspiration for this project came from.
My background is created on Recollections 110 lb cardstock in white. I used Broken China, Worn Lipstick and Seedless Preserves Distress Oxides and had a big of blending fun, I then used my distress sprayer to get that spotted fun reaction. I then stamped out my images with my stamp press using Memento Tuxedo Black.

Tuesday, November 14, 2017

Kat Scrappiness November Challenge Entry

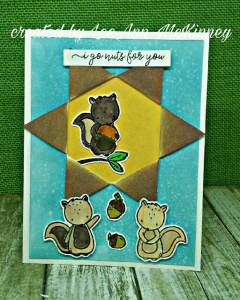
Greetings friends and fellow crafters. LeeAnn here again with a card I made for the KatScrappiness November Challenge. Since I had my Neat & Tangled  "My Favorite Nut" stamp set still out and had already cut the little items, I figured why not put them to use.


I grabbed my Distress Oxides in Broken China, Vintage Photo and Fossilized Amber and went to work. On a 4" x 5.25" piece of watercolor cardstock I inked up the front using the Broken China. I then spritzed it with my distress sprayer and let it sit. I then inked up the area of the card base which is made of 110 lb Recollections cardstock where the hexagon would show from after using the die. At this point I took the Broken China panel and used my big shot to cut the hexagon Pop Out Die from Kat Scrappiness. I stamped the sentiment "I Go Nuts for You" and used one of the sign bars from the Sign Post Set from Kat Scrappiness and my Big Shot to cut that out. after having the hexagon cut, I masked off the area and added the Vintage Photo to the inside of the cutout.

I colored all my images using a combination of Spectrum Noir and Memento markers. All images are stamped using Memento Tuxedo Black ink.

ABNH Entry November 2017 Neat & Tangled and Hero Arts

Greetings friends and fellow crafters. LeeAnn here with my entry for the A Blog Named Hero November Challenge using Neat & Tangled and Hero Arts products, and CASing a DT member. I had a lot of fun with this project and hope it shows.

First let me say as I went through my stamp sets it was hard to figure out what I wanted to use, then I started going through the blog to chose a project to CASE and it all came together quite quickly after that. SO... I went back in time to December 2016 to find the project to CASE. That project came from my friend Donna's introduction post on December 28.
SO, here is the project I chose to CASE:

Didn't Donna do an awesome job?

So, seeing this I went to work. Using Recollections 110 lb cardstock I formed my base 4.25" x 5.50" A2 top folding. I used a postage stamp die to cut my first layer from Quick Quote Sonata paper pack, this pack really lends itself to Fall cards nicely. This layer is 3.5" x 4.5".
My next later is embossed with a Darice Wood Grain embossing folder. This layer is 2.75" x 3.75". Then we get to the fun part. From the Neat & Tangled stamp set My Favorite Nut I stamped the large nut/squirrel stamp with Memento Tuxedo Black. I then used my Brother Scan n Cut to cut it out leaveing a .04 border.
Using my Spectrum Noir Markers I colored this image. I used GB1 and GB2 for the lower shell. EB1 and EB3 for the upper Shell. EB2 for the Inner Shell. RB1 and RB2 for the Squirrels and DG2 for the leaves.
Once this was all dry, I used Memento Tuxedo Black to stamp the sentiment FRiENDS from the Hero Arts stamp set of the same name.
So without further adieu... here is my project.


Please let me know how you think I did.


*ABNH affiliate links included in this post, I do not get paid for this.

Saturday, November 11, 2017

Christmas in the Abyss with Skipping Stones Stamps

Greetings friends and fellow crafters. LeeAnn here with my post using the Christmas Swirl stamp set (coming soon) from Skipping Stones Design. I had fun with this set and I will get busy here and let you know how I did it.


First thing I did was gathered my materials. While I actually used a digital image of the Christmas Swirls stamp set, this could have easily been done with the true stamp set as well. After printing the stamp set image 3 times with a laser printer, I used my Brother Scan N Cut 2 to cut out the images as I knew i wanted 3 of these Christmas ornaments.
I then cut 3 squares of Deco Foil Foil Mates to fit the images while allowing my Scotch laminator to warm up. Once the ready light was on, I covered the balls with the foil and sent them through the laminator twice.
Once they came through the second time I removed the foil to reveal these beautiful images. Using some fun pattern paper from my stash I arranged the ornaments the way I wanted them to appear as hanging from the pine boughs.
Using Tear It! Tape I attached the pattern paper cut to 4" x 5.25" to the 4.25" x 5.50" card base. I also used Tear It! Tape on the Gold, and foam adhesive on the Red and Green, I attached the ornaments to the base. Tear It! Tape was used on the sentiment and my project was then complete.
I have attached here close ups of each side of the card. I love how the detail came through the foil on all three of the ornaments.


Now, as I said this could have been done with the stamp set just as well. There is a great product called Deco Foil Gel. By spreading a small amount on an acrylic block you can use that to simulate a stamp pad, then ink up the stamp and stamp it on your paper, allow to dry. Once dry add foil and send it through the laminator.

Please follow Skipping Stones Designs on the following Social Media Platforms Facebook and Instagram,

Thursday, November 2, 2017

Combing Stamp Sets with Kennedy Grace Creations

Greetings friends and fellow crafters, coming in a little late today with my post, but rest assured I am here. Lesson learned, no more having fun on Halloween when I should be writing my blog post.

SO, here I am with a project I made using two our the great stamp sets from Kennedy Grace Creations. I used the borders from the Vintage Tea Cup set and the sentiments from the Inspire Me stamp set. I hope my project today inspires you to the ability to combine sets and expand their use.


The first thing I did was I stamped the borders with VersaMark ink, this is a clear sticky ink that will allow for watermarking or heat embossing. I used Recollections Extra Fine Detail Gold Embossing powder which I sprinkled on the VersaMark, and then used my heat tool to set it. 
The next step was to set up my sentiments. I used Lady Bug Red Memento Dew Drop ink to stamp that. The Memento is a dye ink that will dry quickly. I took my photo and was pleased, I thought I was finished.

THEN, I woke up and decided it was not finished, I made 3 element dots in the upper right and lower left corners using Nuvo Crystal Drops in Copper Penny. NOW, with adding a red canvas backdrop my project is complete and I am quite happy with it.

Please be sure to follow the Kennedy Grace Creations blog, facebook, twitter, instagram and pinterest. Our Design Team has great projects to inspire you with our great stamp sets. 

November Joy Clair Blog Hop with LeeAnn


Image may contain: text
Greetings friends and fellow crafters. LeeAnn here with my project for the November Joy Clair Blog Hop

I had fun with this project and I do hope you enjoy it as well. 

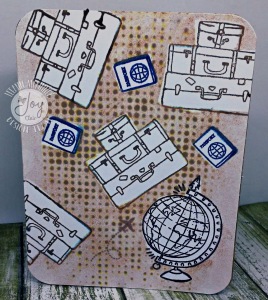
SO, I went to work, and using the new November Release Joy Clair Color By Faith stamp set titled "Send Me", I went to work and came up with this little masterpiece. 


The process used to make this card:

  • First thing I did was using my Stamp Platform I randomly stamped the luggage using Memento Rich Cocoa.
  • I then changed stamps and stamped the little Passport using Memento Nautical Blue.
  • I stamped the globe using Memento Tuxedo Black.
  • and my last stamping was the airplane with the air trail in Gray Flannel. 
  • Once I had all my images stamped and dry I masked off the images using clear contact paper. 
  • Using a Tim Holtz stencil from my stash I tacked it down to my craft mat and used Vintage Photo Distress Oxide to leave the impression on my card panel.
  • I then removed the stencil and sprayed with Tattered Angels shimmer spray to complete the project panel.
  • Using Tear It! Tape I attached the panel to a kraft card base, used my Corner Chomper Crop-A-Dile to rounder the corners off and with that my project was complete. 
I hope you have enjoyed my project today, please be sure to leave a comment and hop over to the rest of the team's blogs and check out their projects as well. Blog is up next... the list is below.

Let's start the fun with the creativity and remember that we always have prizes for our readers and visitors that comment HERE in our corporate blog and in ALL the designer blogs during the hop.
JC_GIFTCARDS
Just leave your comments and tell us which is your favorite stamp set of this release!
Here is the complete list of The November Blog Hop:
LeeAnn McKinney--You Are Here

Have fun and enjoy!!!

Prize: One gift card of $25 from Joy Clair Store.
Winner will be announced on Joy Clair Bog on November 30.
Date of the blog hop: Nov 2
 Please follow Joy Clair's facebook pageColor by Faith Bible Journaling facebook pageInstagram and Twitter, be the first to hear the news, sales and giveaways! They also have a Pinterest page and Youtube channel for your inspiration!
Thank you for stopping by and please come back again soon!

Wednesday, November 1, 2017

Tape Technologies Opal Vinyl with LeeAnn

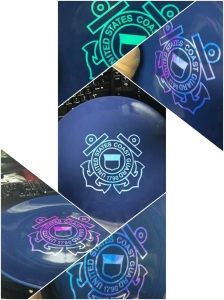
Greetings friends and fellow crafters, LeeAnn here today with a project I made using the Opal vinyl from StyleTech-Tape Technologies.
This vinyl is so awesome and I was so happy to be able to get my hands on it. I think it was the perfect vinyl to use for this project.
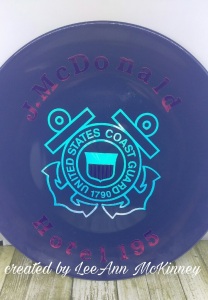
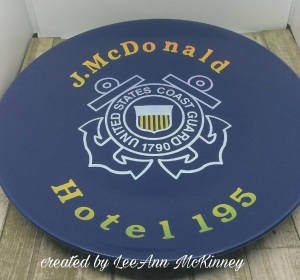
Let me give you a little back story, On October 24 my daughter was sworn in to the US Coast Guard and was swept away from the family for 8 weeks of Boot Camp. I am extremely proud of her, and this project is a gift for when she is back home. I hope you like it.

This first image is a collage showing the different colors this one piece of Opal style vinyl will put off, depending on how you look at it.
 This second image is the finished plate standing and this last is the finished plate laying down.
I LOVE these colors. I really hope my daughter enjoys this plate as a memory many years from how of that 8 weeks in Cape May, NJ.

I used an svg file of the Coast Guard logo and my Scan N Cut machine to cut the image. I then planned out the lettering in the Scan n Cut software and cut it, using the application tape I was able to move everything from the backing sheet to the plate with ease.

Thank you for checking out my project today. Please all comments are welcome.

Joy Clair November Challenge Inspiration

Greetings friends and fellow crafters. LeeAnn here today with my inspiration entry for the Joy Clair November Challenge.
This image is what we were given to work with for inspiration along with the technique of using stencils. I hope you enjoy what I came up with. 


For my entry I brought out the "Fall Leaves" stamp set that was released in August 2017.

  • To make my project I first used a stencil from my stash and "Bo Bunny" Copper glitter paste on Recollections 110 lb white cardstock. 
  • While allowing that to dry I stamped the leaves using Butter Toffee and Rich Cocoa Memento Dew Drops. 
  • I used my Scan N Cut to die cut the images.
  • From that point I arranged the leaves in the order of the wreath and attached them together with Tear It! Tape.
  • The wreath was then attached using foam tape for dimension.
  • I stamped the sentiment using Copper Brilliance ink, and rounded the corners of the block with my Crop-A-Dile. 
  • My base is an a2 4.25" x 5.5" in peach, with a kraft layer of 4" x 5.25" and the final top panel is 3.75" x 5". 
Prize Alert!!!

We have an awesome giveaway! Enter for a chance to win a gift card worth $25 from the Joy Clair Store! The Winners will be announced on the Joy Clair Blog.


Prize: Two gift cards of $25 each from Joy Clair Store.
Winners will be announced on Joy Clair Bog on February 28.
Dates of the blog hop: Feb 3 - Feb 6. Comments until February 6.
 Please follow Joy Clair's facebook pageColor by Faith Bible Journaling facebook pageInstagram and Twitter, be the first to hear the news, sales and giveaways! They also have a Pinterest page and Youtube channel for your inspiration!