Tuesday, June 30, 2020

Same Set Syndrome Blog Hop with Joy Clair Designs

Image may contain: text that says 'Same Set Siyndrome SHOWCASING SOME OFTHE CRAFT NDUSTRIES FINEST SMALL COMPANIES FINEST'

Greetings friends and fellow crafters, LeeAnn here with the Handmade Happiness Same Set Syndrome Monthly Blog Hop. This month we are featuring stamp sets by Joy Clair Designs. For my project I am using the Oh Lala set which is one of the images in today's release. 

You should have come here from Renee's Youtube video, if not, you can click here to see it!!!

I'm posting 2 views of the same image so you can see the foiling that was done on this sassy little pup as she is strolling through with her margarita and purchases. 
I did use the digital version of this set, and made a background with the lipstick tube from the set, and used the various reds from my "Karin" waterbrush markers to color up the tubes in ombre fashion. 

For the pup I printed and cut using my Brother Laser Printer, cut out using my Scan N Cut, and using Minc "Gold" foil and my MiniMinc I was able to transfer that foil to the image.

I used circle dies to cut the black and gold mirror cardstock to frame the dog. I then cut the background panel which I layered on black cardstock and then layered on gold mirror cardstock which I attached to my card base. 

A few strategically placed sequins completed my card. 


I hope you have enjoyed my card today. From here the next person in the hop is over on Instagram: Maritza


Disclosure: The links below are affiliate links. If you decided to use these links to shop, you are supporting today's post writer - thank you! They may receive a small portion of the sale, at no extra cost to you. These products are endorsed by teh author, and we hope you will love them too.
Recollections 110 lb Cardstock
Shop at:
MISC
Recollections 65 lb Cardstock
Shop at:
MISC
Crafty Foam Tape
Crafty Foam Tape
Shop at:
JCD
Ooh LaLa Clear Stamps
Shop at:
JCD
Ooh LaLa Digital
Ooh LaLa Digital
Shop at:
JCD

Joy Clair New Release Day 1


Hey there friends and fellow crafters. Welcome to the June/July Release of Joy Clair Designs. This release will include 3 stamp sets in both Digital and Clear Stamp Formats for your crafting pleasure.

First up is.... OOH LaLa... this sassy little pup just cracks me up. For this stamp set however I chose to use the make up pallet however. 
\

 
I had so much fun with this. First I pulled the image into Paint3d and made it larger. I then printed it and the sentiment at the same time to make my life easy. 
I used my Ohuhu alcohol markers to color the case and brush. I then used Perfect Pearls as the make up to give it the shimmer and shine. I then cut a panel of silver mirror cardstock to simulate a mirror. My panel was layered on black cardstock which I then layered on pattern paper to match the colors from an Echo Park paper pad called "Fashionista" This was then layered on Black also and mounted on a white 4.25" x 5.5" card base. 


Now this bossy man gave me some fun trying to figure out what to do with him. 


For my first card I came up with this...
Using the pawprints from the set I made a background panel which I used the background effect in Photoshop Elements to color in my favorite green. I printed with my laser printer and cut the dog and food bowl with my Scan n Cut. I then colored the images with my Ohuhu Markers. I popped up the images with phone squares and my project was complete. 

For my second card using this set... 
I went back to Paint3D and added 2 pups to my panel a large and a small. I then added the sentiment. Using a cloud stencil I added the sky with Tumbled Glass Distress Oxide, and the grass with Lucky Clover. Last part was adding a few paw print Sprinkles around the ground. 

 The last stamp set of this release is A Little Wine... 

For my first card I went with a Slim line card.I cut 3 of the wine glasses that little mouse is having fun with. each a little larger but not much than the one prior, and colored in different shades of pink to go along with different shades of wine. I printed and cut the sentiments, arranged the Wine a little a different way to say A Little Wine... and had fun with it. 

For my second card using this set I went with the little mouse and his wine. I went with a Pinot Grigio as that is my favorite from the Cupcake Vinyards. I backed it with a black layer and added to a champagne color card base. 


I hope you enjoy my inspiration using these 3 stamp sets today, I sure did have a lot of fun making them.


Disclosure: The links below are affiliate links. If you decided to use these links to shop, you are supporting ME - thank you! I may receive a small portion of the sale, at no extra cost to you. These products are endorsed by ME, and I hope you will love them too.
Recollections 110 lb Cardstock
Shop at:
MISC
Recollections 65 lb Cardstock
Shop at:
MISC
Crafty Foam Tape
Crafty Foam Tape
Shop at:
JCD
Scalloped Edge Nesting Slimline Dies
Shop at:
KS
Embossed Edge Nesting Slimline Dies
Shop at:
KS
A Little Wine Clear Stamps
Shop at:
JCD
A Little Wine Digital
Shop at:
JCD
Ooh LaLa Clear Stamps
Shop at:
JCD
Ooh LaLa Digital
Ooh LaLa Digital
Shop at:
JCD
Big Hugs Clear Stamps
Shop at:
JCD
Big Hugs Digital
Big Hugs Digital
Shop at:
JCD
Wonky Stitched Rectangle Dies
Shop at:
KS
Brown Paw Print Sprinkles
Shop at:
KS

Thursday, June 25, 2020

Besties... June CCC Post using Critters and Stencils


Image may contain: text
Greetings friends and fellow crafters. LeeAnn here with a first post with the other designers as part of the Collected Crafty Collabs. We will be posting each month following a theme/technique or both and this post is using Critters and or Stencils. 
You Should have come to me from Yvette and the next link will be at the end of this post.


To make this fun project I started out using the Best Buds stamp set from Joy Clair Designs. Something about Turtles and Rabbits playing together just makes me happy. Funny is one of my daughters has a bunny and we have a turtle, so it I guess does make sense after all. 
I used an MFT cloud stencil to create my sky using Tumbled Glass Distress Oxide. I used a Heffy Doodle stencil for the hillside with a combination of Shabby Shutters and Lucky Clover Distress Oxides. 
I added some fun little butterfly sprinkles around the scene to add some fun. 
This panel is cut to 3.75"x 5' and is layered on a panel that is cut slightly larger than that.
These panels were then adhered to a 4.25" x 5.5" A2 size card base and my project was complete. 


UP NEXT: Natasha


Monday, June 22, 2020

Many Blessings with Joy Clair Designs

Greetings friends and fellow crafters. LeeAnn here with my Monday Joy Clair Designs post. This week I am going to use a stamp set form our Last Call section of the store called Many Blessings. I love this stamp set and am sure you will as well.
Today I have 2 cards that I created.


For this first card, I used the sunburst style image, and placed it on my stamp platform in an a position that I would be able to have the layer of cardstock against the edge and stamp in a straight line.
I used Memento Dye Inks to ink up the image going in Rainbow order using Rose Red, Tangelo, Dandelion, Cottage Ivy, Bahama Breeze and Grape Jelly. The sentiment was stamped using Memento Tuxedo Black.
For this second card I used a wreath builder stencil, to stamp out my pattern. The colors used starting from the top going clockwise are Lady Bug, Tangelo, Cantaloupe, Cottage Ivy, Bahama Blue, Grape Jelly, Lulu Lavender and Rose Bud. The center sunburst was stamped using Dandelion. The sentiment was stamped using Memento Tuxedo Black and Ladybug. 
I really had fun with these cards, I have already sent them out to their new homes, and I hope I have inspired you to pull out or purchase this set and make a fun card yourself.

The stamp set I used and many more can be found at The Joy Clair Store
See the rest of the teams posts on our blog
Follow us on Pinterest and Instagram

Wednesday, June 17, 2020

The Makers Movement Winners Post

Hey there friends and fellow crafters. It's LeeAnn and this week has been INSANE, INSANE I tell ya. I am so sorry I have not had a chance to make a follow up card using this wonderful here's stamp set. But I did start a new full time job last week, and I am NOT a morning person. Well I have had to be at my desk in my home office/craft room at 10am every day and wow, for me that is rough.
SO... I did promise a giveaway this week, and even without the card I wanted to get that done. 

Thank you so much to all who entered.
Creative Lady
Renee Moran
Marie Bingaman
ScrapSecrets
TikiTink
TR
Ocean-Dreamer
Maria Nyce


I would like to thank everyone for playing. Creative Lady please send your address to kraft4fun@gmail.com with Makers Movement Hero in the subject line and this will go out in the mail this weekend. Congratulations I can't wait to see what you make using this cute set. 

As a reminder, this is the stamp set I was giving away and it can be purchased at 


Monday, June 15, 2020

Whole Lot of Shaking Going On with Joy Clair Designs

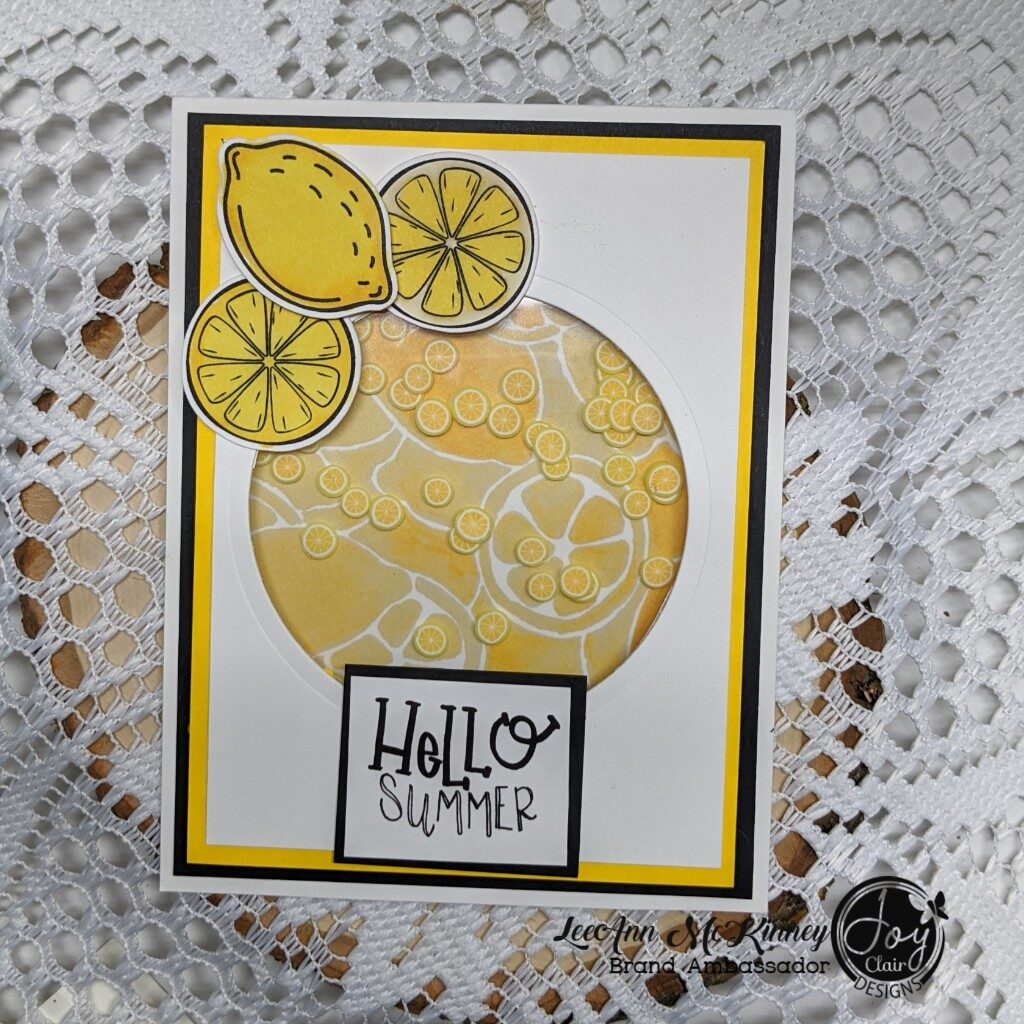
Greetings friends and fellow crafters, LeeAnn here and OMG, let me tell you Summer has arrived in Florida and full force at that. Today I am playing along with the Joy Clair Designs "Life Is Sweet" Stamp set and having a great deal of fun. This set with all the fruity cuts of goodness and sweet sentiments just made it fun to play with. So how about we take a look at what I made:

Card Number 1:

The background paper came from a destash purchased last year, and I am not quite sure what company made it. However it went just perfect with this stamp set.
First cut a panel of white cardstock 3.5 x 4.75. Then, a bright yellow cardstock was cut 3.75" x 5". And a 3" circle die was used to cut through both panels.
A sheet of acetate was adhered between the 2 using double stick tape. Additionally, a layer of foam tape was used to outline the frame of this panel. Then, the lemon slice sprinkles were added and then another panel of acetate was stuck down.
A panel of the lemon background paper was cut at 3.5" x 4.75" and adhered to the second panel of acetate using double stick tape and then attached to the final Black panel which was cut 4" x 5.25", all of this was then attached to a 4.25" x 5.5" A2 Top folding cardbase.


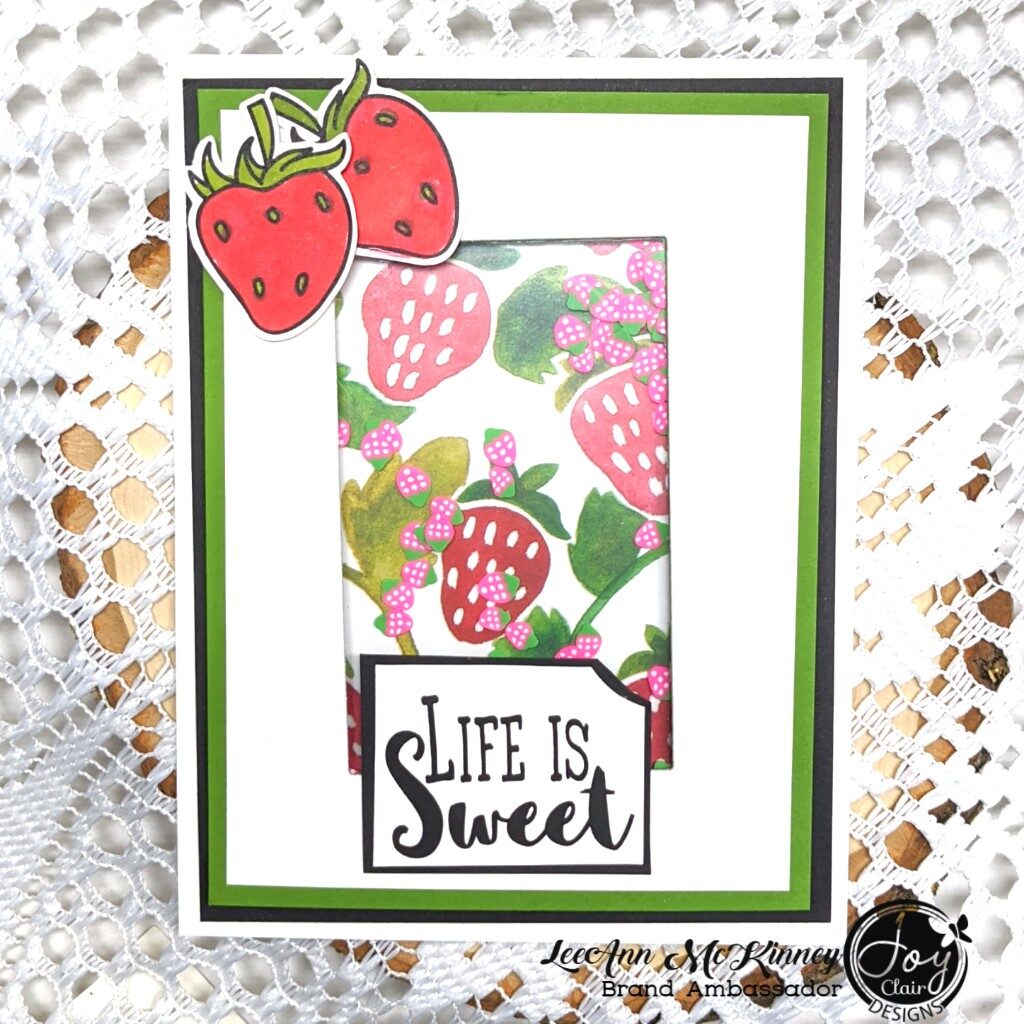
Card 2:
This second card was made using the same directions/dimensions as the first, however I used a rectangle die to cut the shaker window and strawberries were added to the inside.

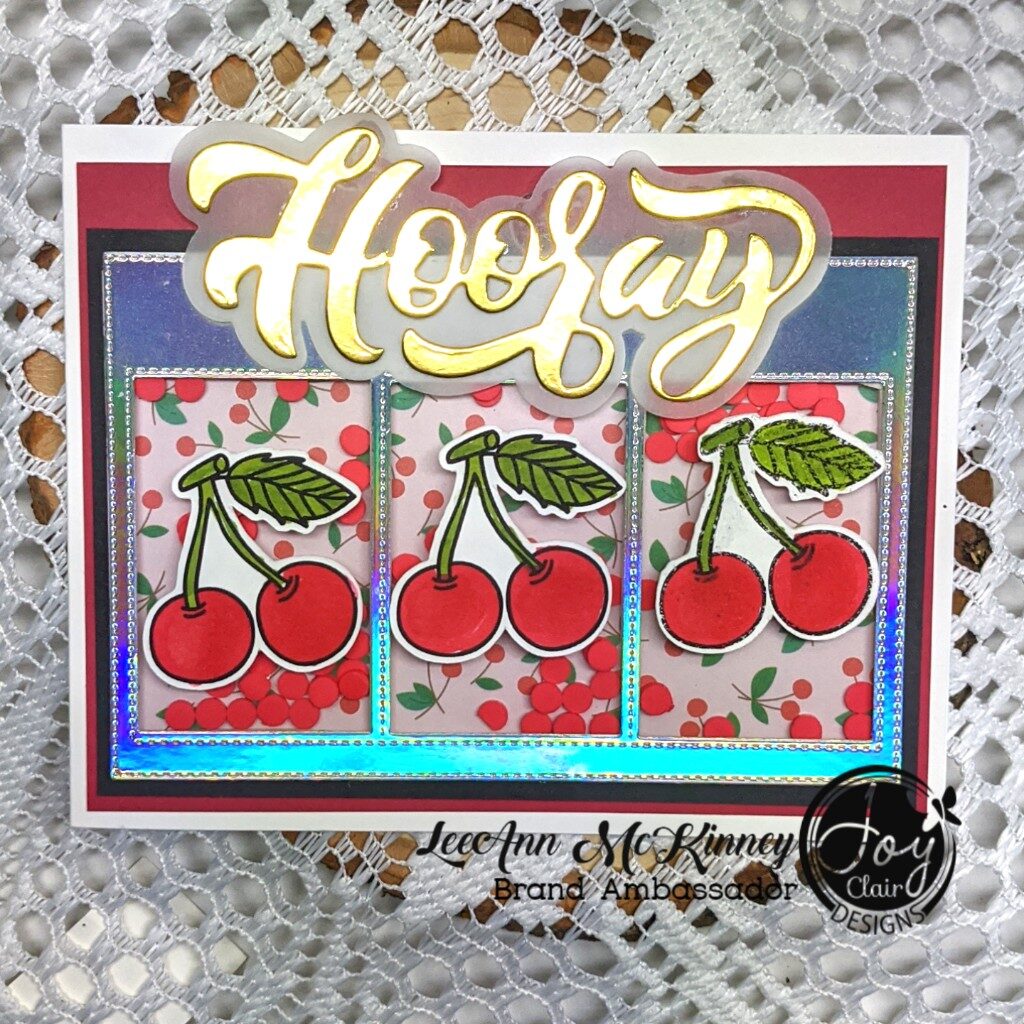
Card 3
This last card is honestly my favorite. The background paper is from a Recollections paper pad, The Gold and Silver Mirror cardstock is from a Park Lane paper pad. I used a frame die from my stash to cut out the main frame panel from the Silver Mirror cardstock.
I attached the acetate to that panel using double stick tape, used foam tape to make the shaker section, then attached another panel of acetate. The Cherry background paper was then attached to the black cardstock, then to the red and my cardbase.

The stamp set I used and many more can be found at The Joy Clair Store
See the rest of the teams posts on our blog
Follow us on Pinterest and Instagram
All coloring was done using Ohuhu Alcohol markers.

Thursday, June 11, 2020

Your My SuperHero with The Maker's Movement


Greetings friends and fellow crafters, LeeAnn here today with a fun birthday card for your favorite SuperHero. Right now this card is being put aside for my grandson, his birthday isn't until August, but it is nice to know I have one made already. Little man will be six already and I just can't believe it. If  you have been following me all this time, where has the time gone?


Today I used the You're My Hero stamp set from The Maker's Movement and wow this set is full. While I only used 6 of the stamps on this card, there are a lot more sentiments and a few other images that I will be using for another card next week.

To make this card I stamped out the Hero using Memento Tuxedo Black Ink and colored him up with my alcohol markers. I used my Scan N Cut to cut out the image. I used pattern paper out of a DCWV Boy Stack for my background layers.I layered the pattern papers on black recollections cardstock and added all to an A2 cardbase.

The Burst and Sentiments are stamped using VersaFine Clair ink in Nocturne, I love this black for my sentiment stamping.

NOW, if you have read this far, you would have read that I am gong to have another card next week, why is that since I usually make one card a month for Maker's Movement. WELL, the power's that be have been very gracious and sent and extra of the Your My Hero's stamp set so that I can have a giveaway this month.

SO... Leave me a message here in the comments telling me who you would be making a You're My Hero card for. I am excited to hear about it. This contest is running from today, 6/11/2020 at 12:01 am EST, and will run until 6/17/2020 at 11:59 pm EST. I will have my next post on the 18th with the winner's name. Sorry to say due to shipping costs, this is restricted to the USA shipping addresses.

Thanks for reading, again I can't wait to see your responses.

Monday, June 8, 2020

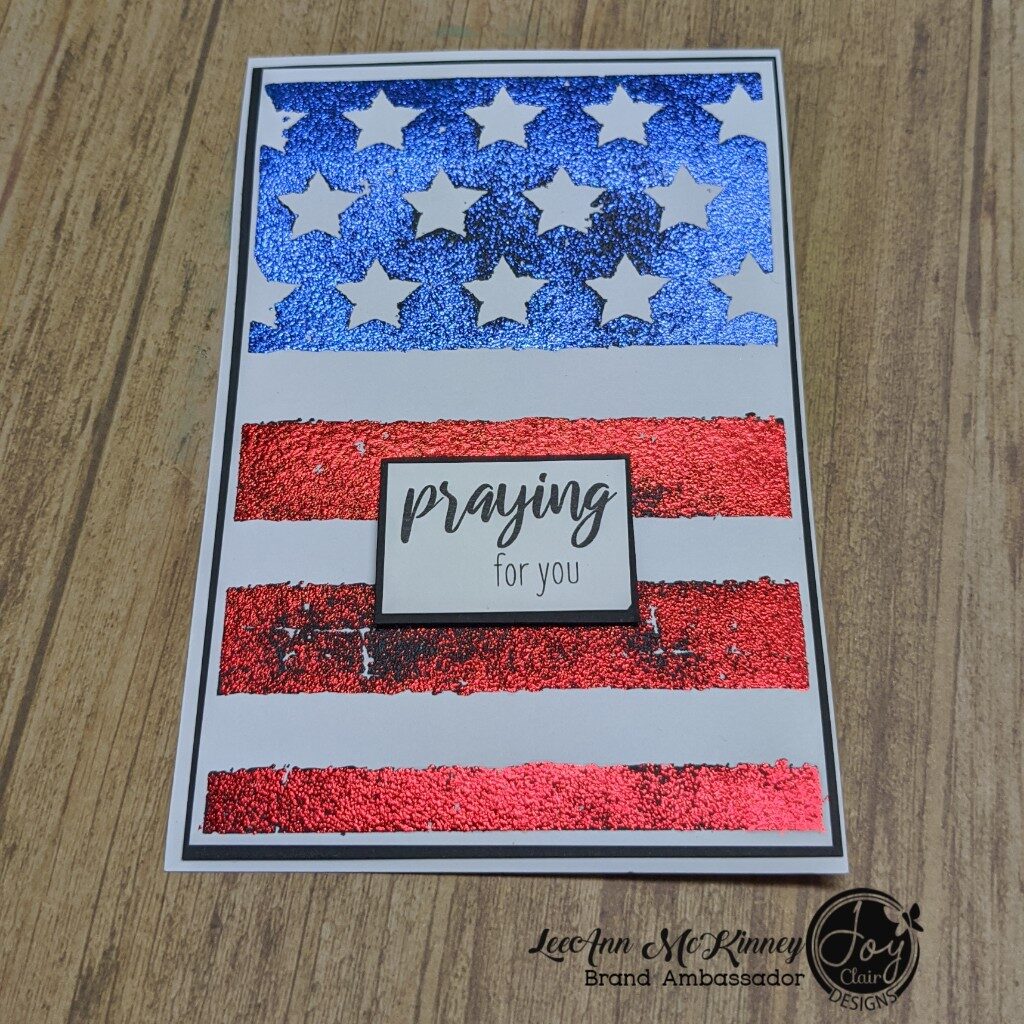
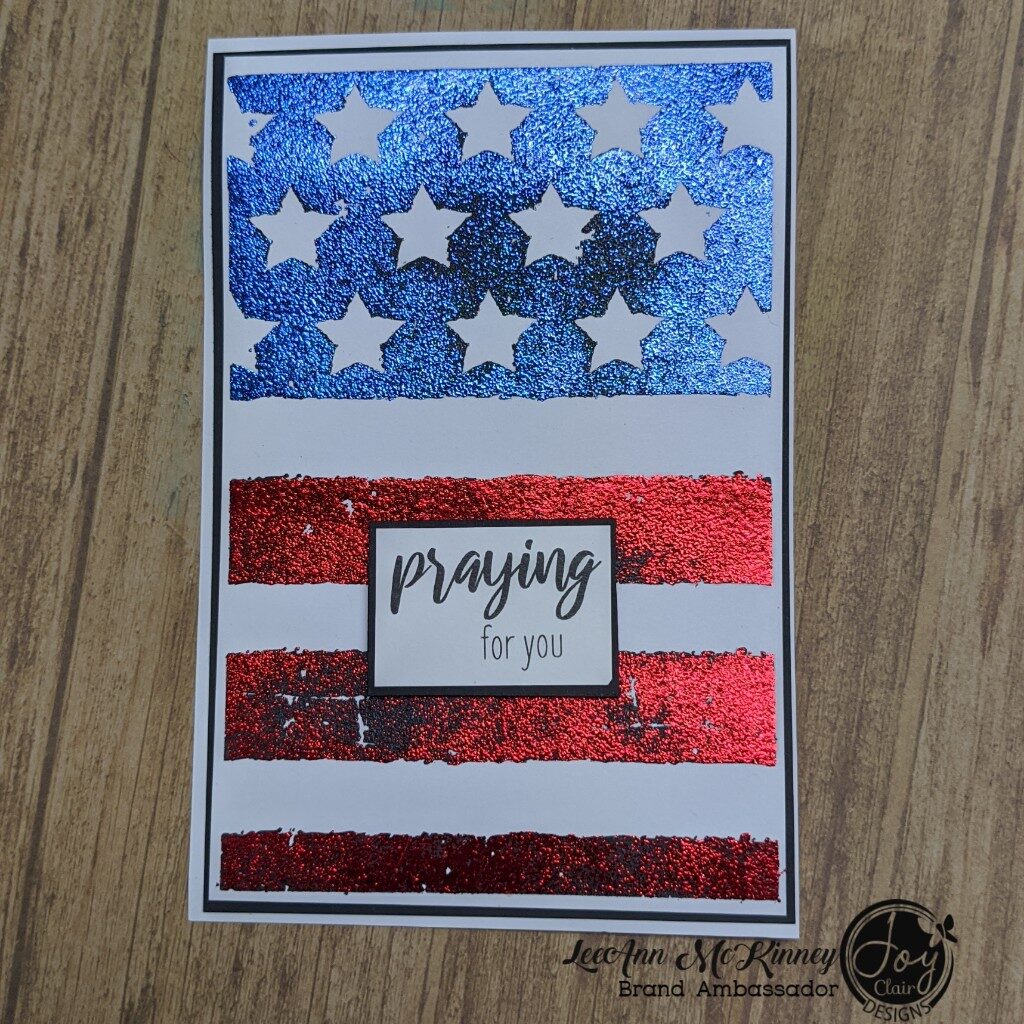
Praying for America with Joy Clair Designs

Hi there friends and fellow crafters, it's LeeAnn and I am here today with a project I made using the Joy Clair Designs stamp "Grunge Flag". In the United States Flag Day is celebrated on June 14, commemorating the date the flag of the United states was first adopted by the Second Continental Congress in 1777.

  1. To make this flag first I stamped the Grunge Flag image using Memento Tuxedo Black ink
  2. Once dry I used my embossing buddy over the whole image
  3. Stamped over it using VersaMark sticky ink.
  4. I then sprinkled Judikins Sticky Embossing Powder over the image
  5. Used my heat tool to set it.
  6. I cut 2 panels of Gina K foil, Brilliant Blue and Red Velvet to fit the sections of the image. Now I did something that was a first for me. I usually foil in my laminator or Mini Minc, however by using that sticky embossing powder a new way was made.
  7. Gathering the plates for my Vagabond 2 die cutting machine, I had my main platform, then a new plate, my flag panel, the foils silver side down, then another new plate
  8. Ran them through the machine.
  9. Once out the other end I took the flag panel back to my desk
  10. Peeled away the foil and was very happy with the result. 

So, now you have had a little history lesson behind my project today. Please hop on over to the Joy Clair Designs website and pick up your "Grungy Flag" stamp today.