I have made a video with this process, however, my voice is not working properly so I have decided to write a tutorial to go along with the video.
So without further delay here is how I made my project.
1. Decide the paper to be used. For this, calendar project I used Recollections 2016 Valentine's Day paper packs. Joy Clair Wonderland letters stamp set, Versafine Black Onyx ink pad, Silver table scatter, a plastic calendar blank, Fiskars trimmer, Acrylic photo frame, Brother Scan n Cut, XYRON X, XYRON Wedge Glue Stick, XYRON Adhesive Eraser, Bone Folder and Dry Erase Marker.
2. The first thing I did was stamp out my letters on white card stock. I then ran them through the scan n cut with an offset of .4 to leave a white trim. I then changed the paper to the Deep Red and ran that through the scan n cut with a .8 offset.
3. After the cutting was complete, I added the letters to the XYRON X and pulled through. I also added a few pieces of the table scatter. I really love the X when it comes to small work like this as I do not enjoy getting glue all over myself and my project, and the X takes that worry away.
4. Once all the letters and table scatter were though I tore it off the X and used my bone folder to smooth it out. As you can see in the video I made it a little too smooth. I then adhered the top layer of the letters to the Deep Red layer. I used the adhesive eraser to take care of any goobers remaining.
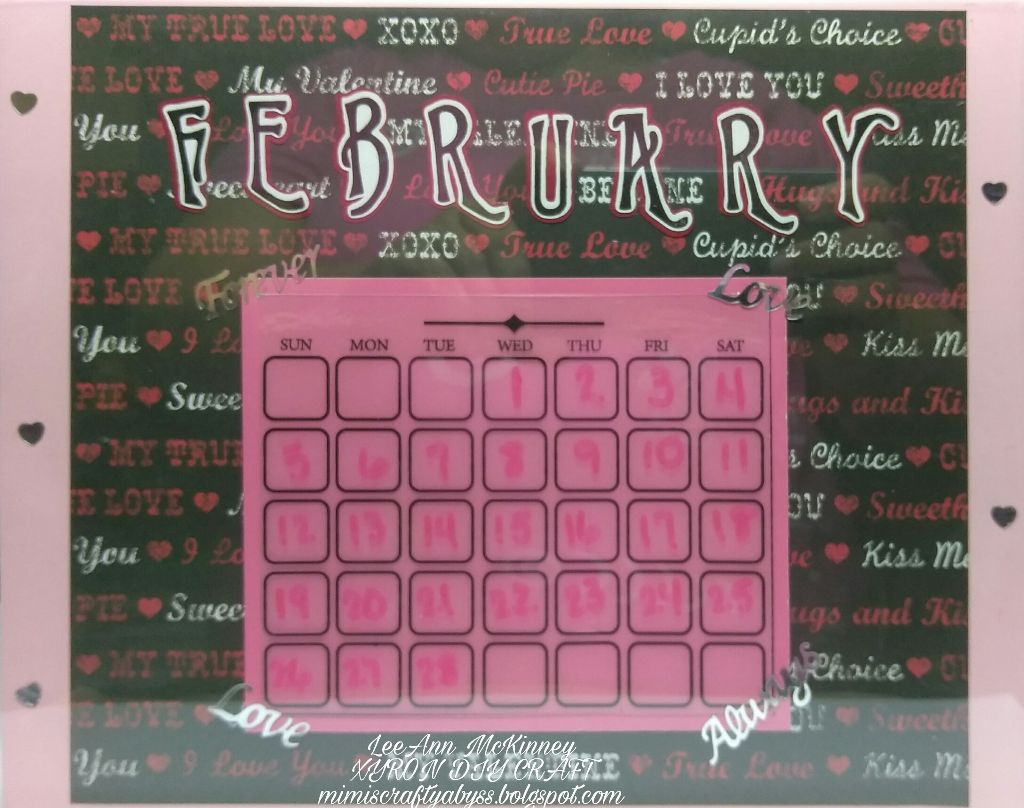
4. The Pale Pink page is 8.5 x 11, the Black sentiment layer is cut to 7.75 x 8.5. I used the Wedge to adhere the sentiment sheet to the Pale Pink, and then the calendar blank to the darker pink. and then centered that on the sentiment page.
5. With the layering all complete I used my ruler to help center the letters the best possible starting in the center and working out on the page.
6. The table scatter was affixed in the four corners, with the top corners saying Forever Love and the bottom saying Love Always. I then added 3 hearts to one side of the page and 2 hearts to the other.
7. Realizing that the page was not the right size for the 8 x 10 frame that I had, I cut .25 inch off each top and bottom as well as the sides, and the page fits perfectly.
8. To finish off this project I used a dry-erase marker from EXPO and wrote the dates in the proper spaces for February.
I hope you have enjoyed my project, here is the video for your enjoyment to show exactly how the process was complete, fumble fingers and all. It is set to music as I am having some voice issues today.
[youtube=https://www.youtube.com/watch?v=ImRRMK1msA4&w=320&h=266]
Thank you so much and please come back to my Crafty Abyss and see me soon. Comments are greatly appreciated and welcomed.
Fabulous! Very detailed!!
ReplyDeleteI love your calendar project! The papers and colors are so pretty!!
ReplyDeleteLove it! Good luck with the DT!
ReplyDeleteThank you Sara.
ReplyDeleteThank you Lori
ReplyDeleteThank you Samantha
ReplyDelete