
There are so many great items available from ScraPerfect, and I hope you will be as happy as I am to use it all.
Today for my project I used the Crafting Pouch, and The Best Glue Ever.
 The first thing I did was to use a Spellbinders die to cut two of the the doily form out of silver Rinea Foil Paper, one for each card.
 First I stamped the Happy Birthday Starburst. I decided to go with this one, as April is a very busy month for birthday's in my family.
 I glued the stamped panel to my foil doily and added some of the silver bits that remained after cutting the doily out, along with some of the Orange and Yellow glitter bits from ScraPerfect.
 I then used the Perfect Crafting Pouch to get rid of the static on the Shaker Cover. I used the Best Glue Ever and glued down the shaker cover, as well as the paper element ring. I added this element first to a panel of cardstock that I used an MFT stencil on with Fossilized Amber and Carved Pumpkin Distress Inks to blend for my background, as I really felt the colors matched my shaker bits and stamped sentiment.
 For the second card I used the same idea and used a panel from the DCWV Birthday Wishes Stack 6"x6" pattern paper as my background.
 With this last one I decided to add a little more pop by way of 3 die cut balloons in coordinating colors to match the background.
When my project was complete I used the Best Cleaner Ever to clean my stamp, stamp block and stencil. I followed that by wiping everything down with the Perfect Cleaning Cloth.


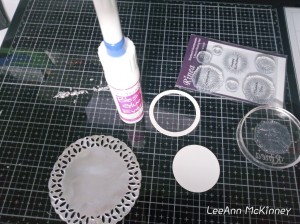
I then gathered the supplies I would be using to make my shaker element.
The stamp is Starburst Sentiments from Rinea. The shaker form is from MFT. And of course I used The Best Glue Ever to hold it all in place.


When my project was complete I used the Best Cleaner Ever to clean my stamp, stamp block and stencil. I followed that by wiping everything down with the Perfect Cleaning Cloth.
Listing of products used in this project from ScraPerfect.
Best Cleaner Ever
Other items used:
Rinea Foil Paper
Rinea Starburst Stamp Set
MFT Circle Burst Stencil
MFT Circle Shaker Pouch
Other items used:
Rinea Foil Paper
Rinea Starburst Stamp Set
MFT Circle Burst Stencil
MFT Circle Shaker Pouch
No comments:
Post a Comment